HARD RACING.com 2012 Polaris RZR S
Project Build

 |
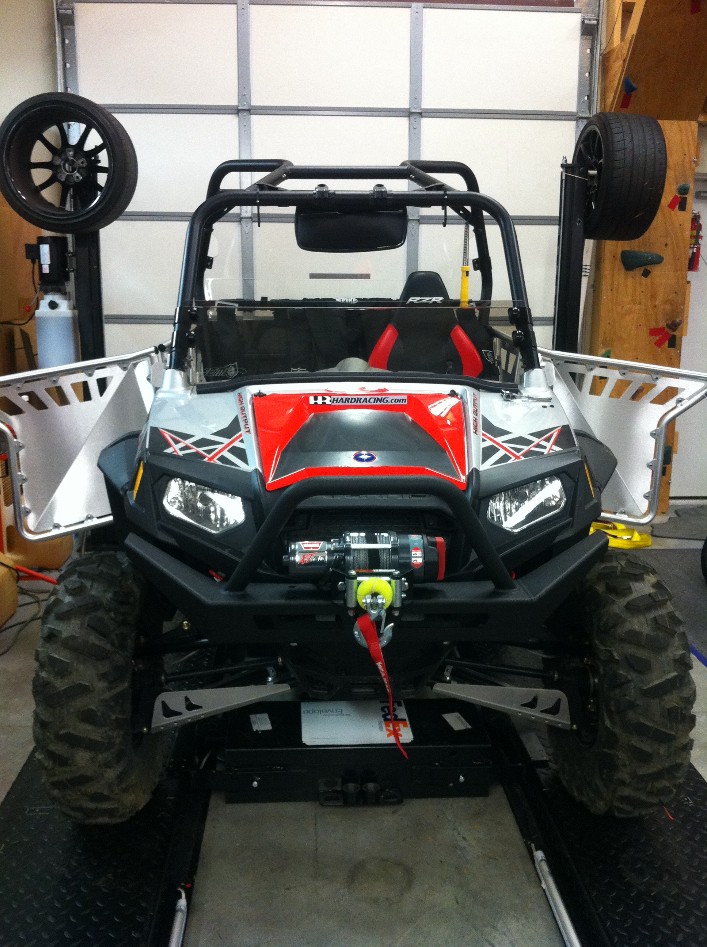
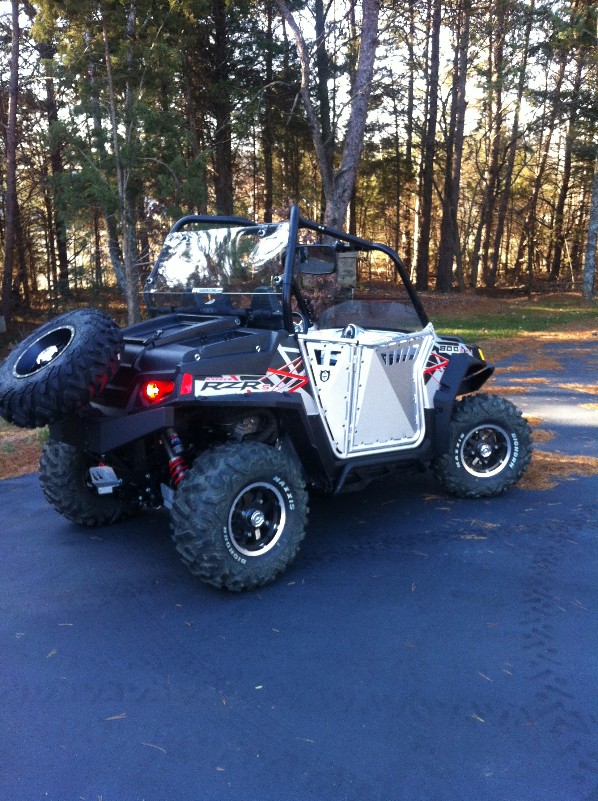
Hard Racing Performance 2012 RZR 800 S Project Build
Pre-Installation Setup 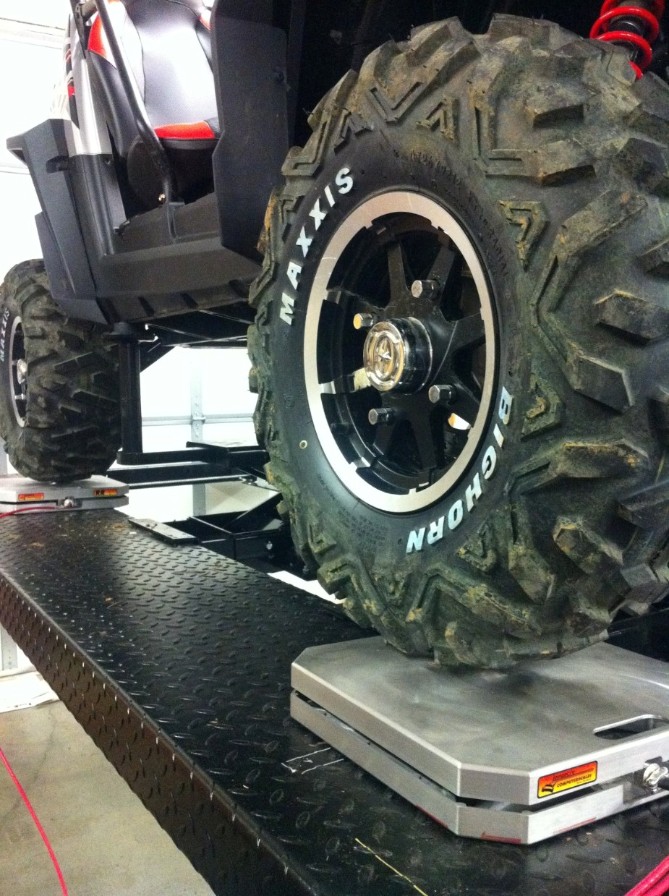

So before we got started, we took some measurements.
We measured the Ride Height of the RZR.. so we could adjust the shocks after all
the parts were installed to keep same ground clearance as. We also took the
corner weights of our RZR, to have a base line.
Its Basically, How much each corner weighs along with TOTAL weight of the RZR.
We knew we were going to be adding a lot of weight, but wanted to know exactly
how much and where the weight is.
This would help us setup the RZR Suspension after the modifications to keep it
balanced.
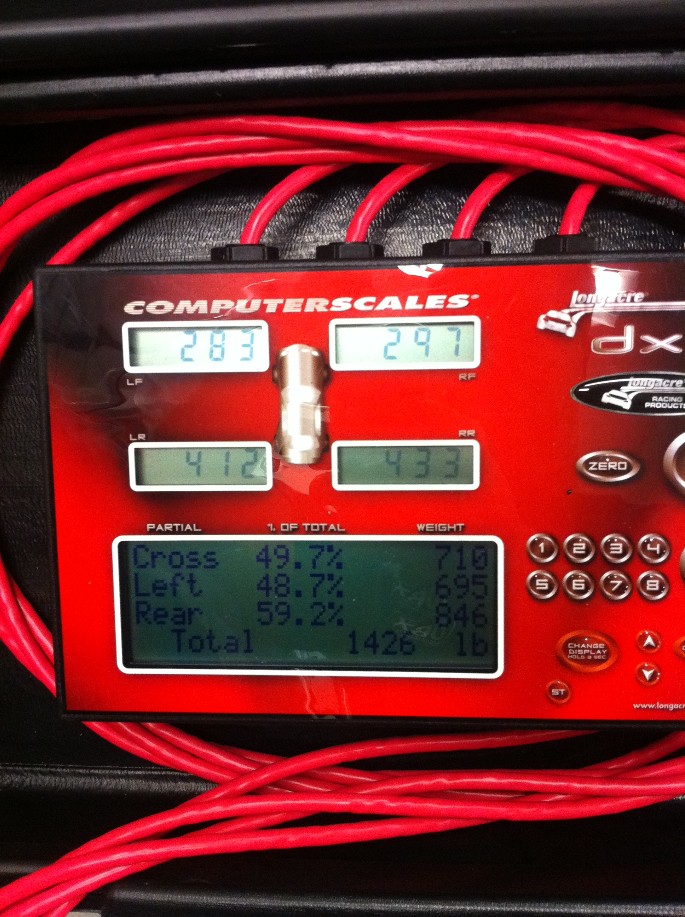
So our Corner weight Scales showed the RZR in Stock Trim came in at 1103 lbs
Total w/ a ˝ tank of Fuel
41.8% of that weight was in the front, and 58.2% in the Rear. Cross weight was 49%. Meaning the Machine was pretty close to the optimal 50% cross weight. On Road surface you want it within .5% but for off-road 49% Is fine.
The Project Begins
Under Body Protection
So. Our First order of business was Protection.
The stock plastic Skid is not bad. Especially in later model years, they made
them better then when the RZR First came out.
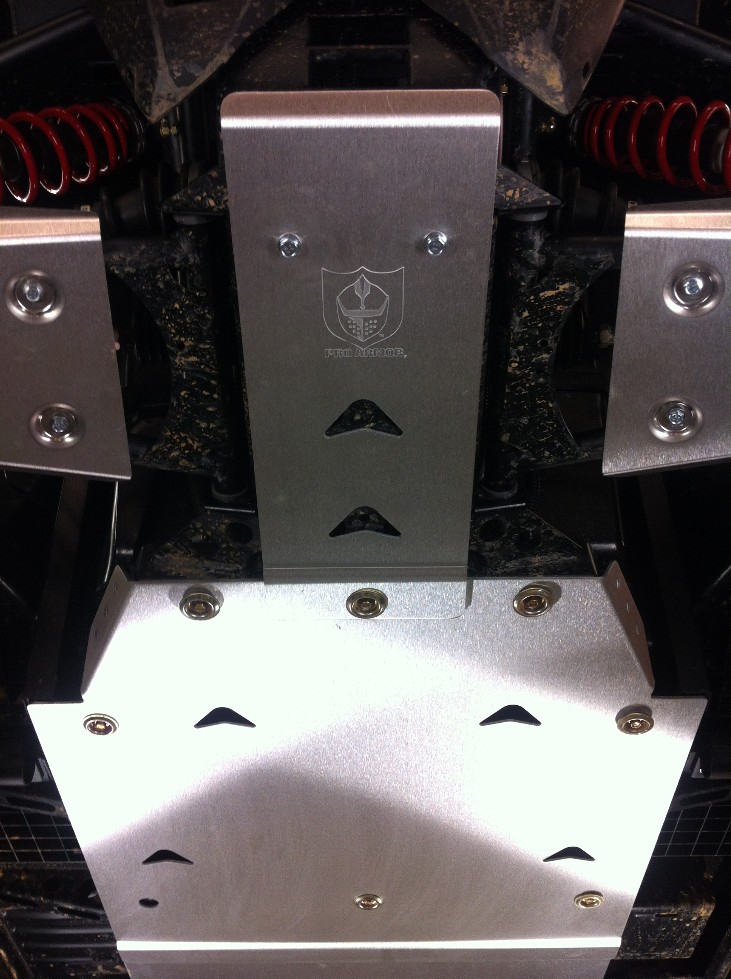
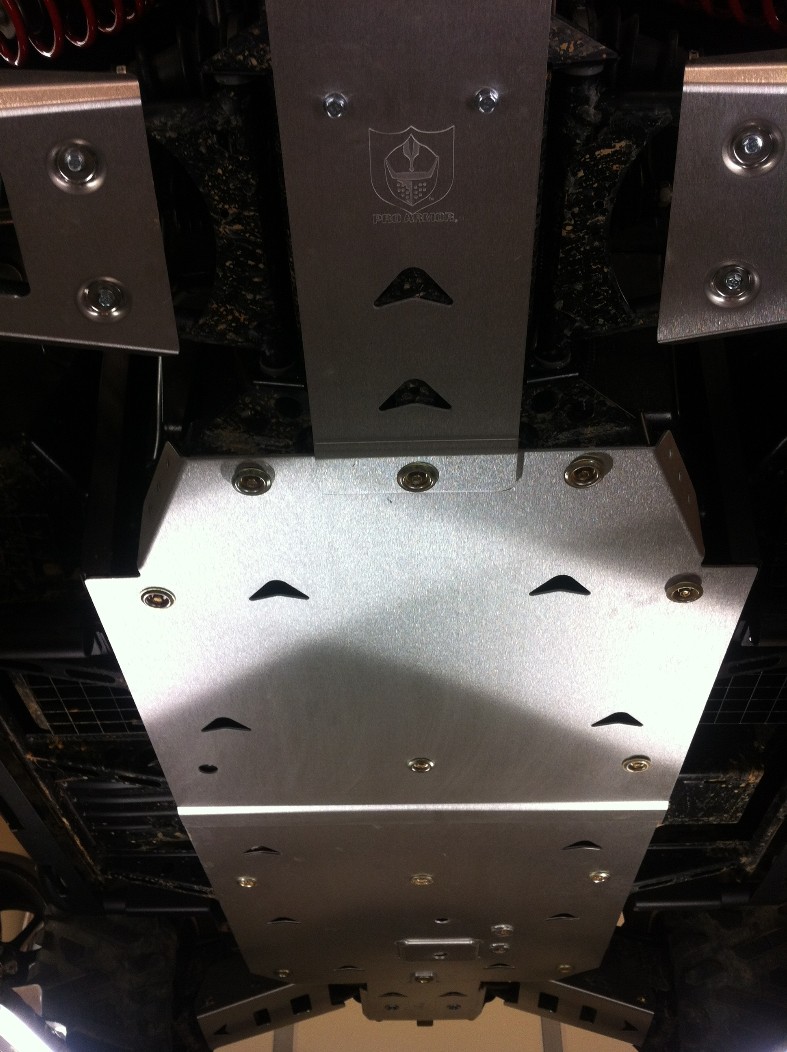
But there is still NO protection under the 4 A-Arms. Nothing on the sides,
and Nothing in the Front Center, or Rear Center. So We installed a complete
Pro-armor Kit. Consisting of High Grade Alum. Protectors for the Front A-Arms,
REAR A-Arms, Front Skid (Under the Diff) , Center Front, Center Rear, L&R Sides,
Rear Skid Under Diff .


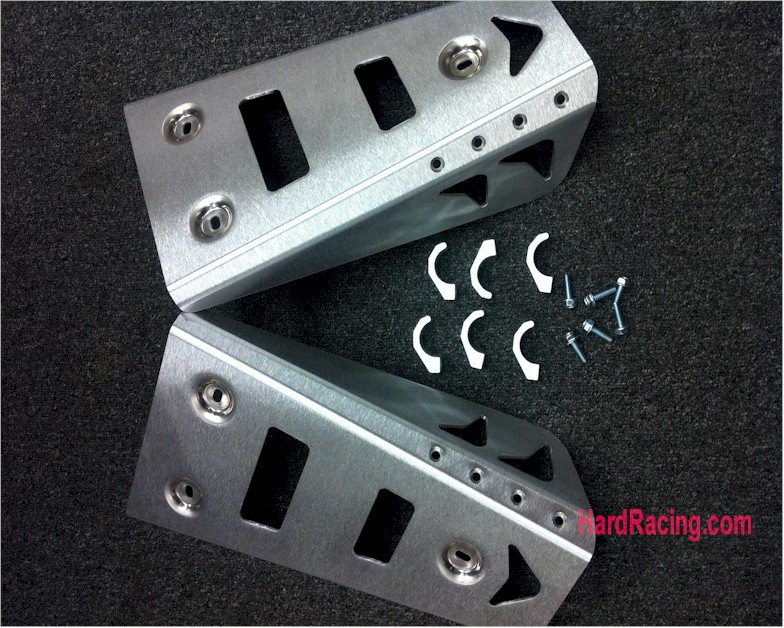
FRONT A arms
Install is fairly straightforward takes about 5 min. Kits
include all the hardware using ˝ shell brackets that clamp onto the A-Arms.
Beforehand test fit everything aligns up good while the bolts are loose. Try to
push the armor plate back as far as possible so it's butt up against the front
of the a arm and tighten everything down nice and secure very easy and
straightforward. We would recommend putting blue Loctite on the bolts.


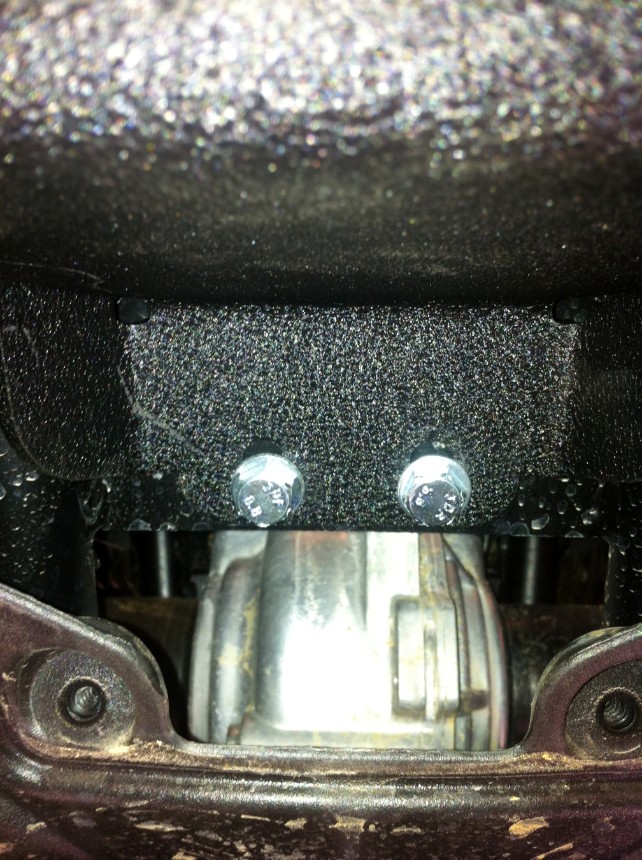
REAR A arms
Like the Front, straightforward install takes about 10
min. Kit comes with Some Self Tapping screws.
We added an extra one, for more secure install. Again Loctite BLUE on all
bolts. We have yet to have any bolts fall out or come loose.

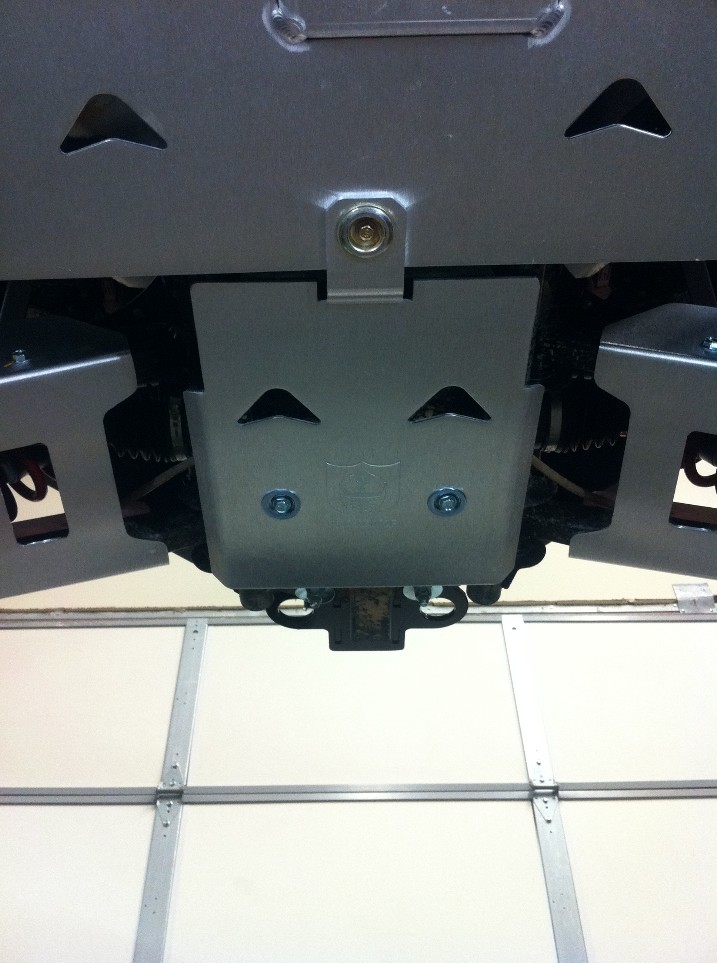
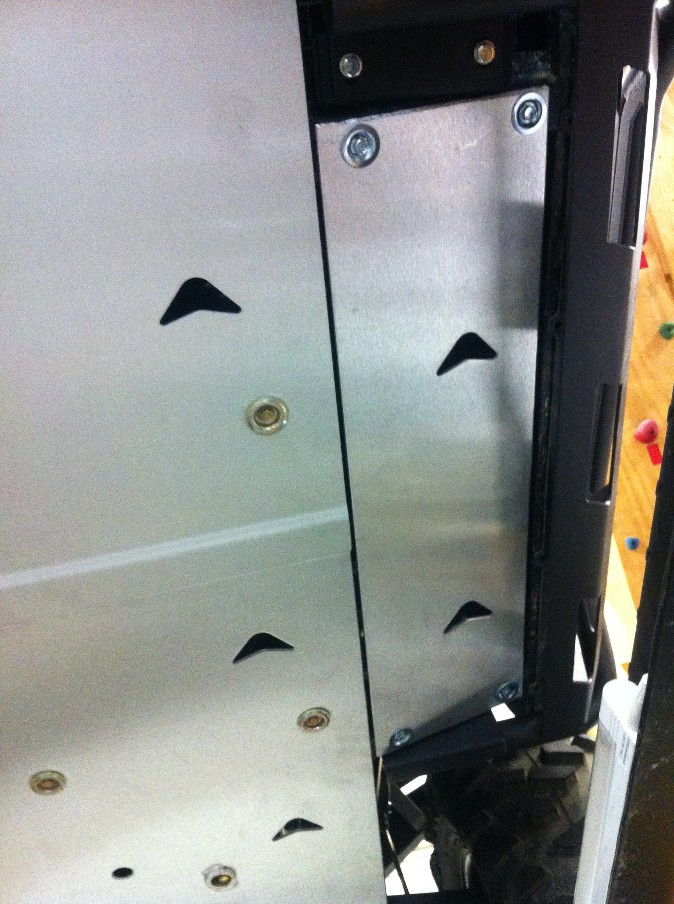
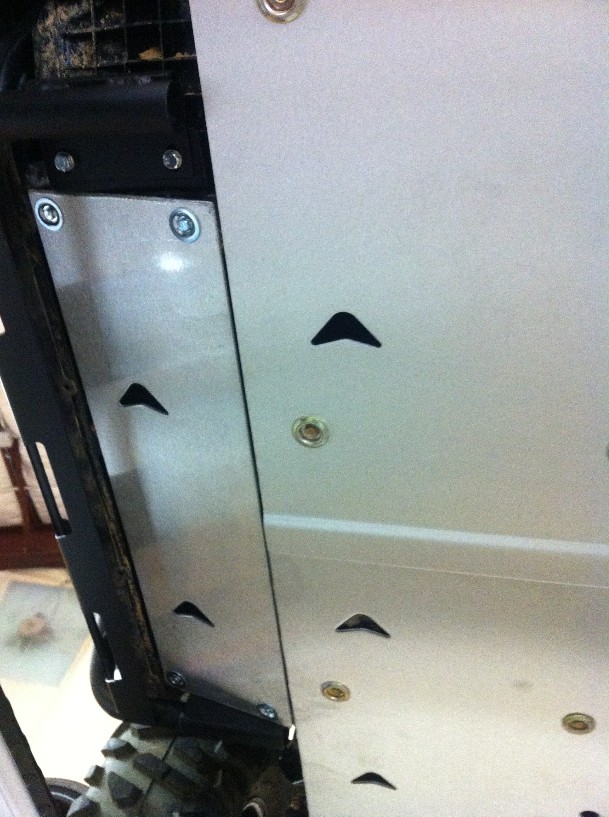
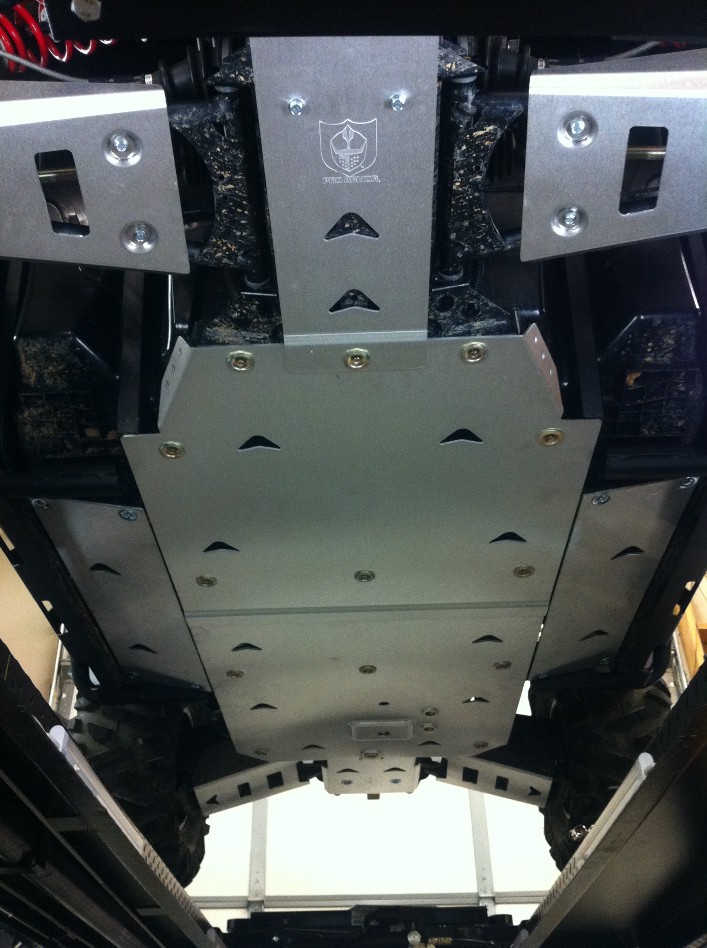
Center, Center Rear, Sides
Same Easy to install layout. Kits use OEM Fasteners
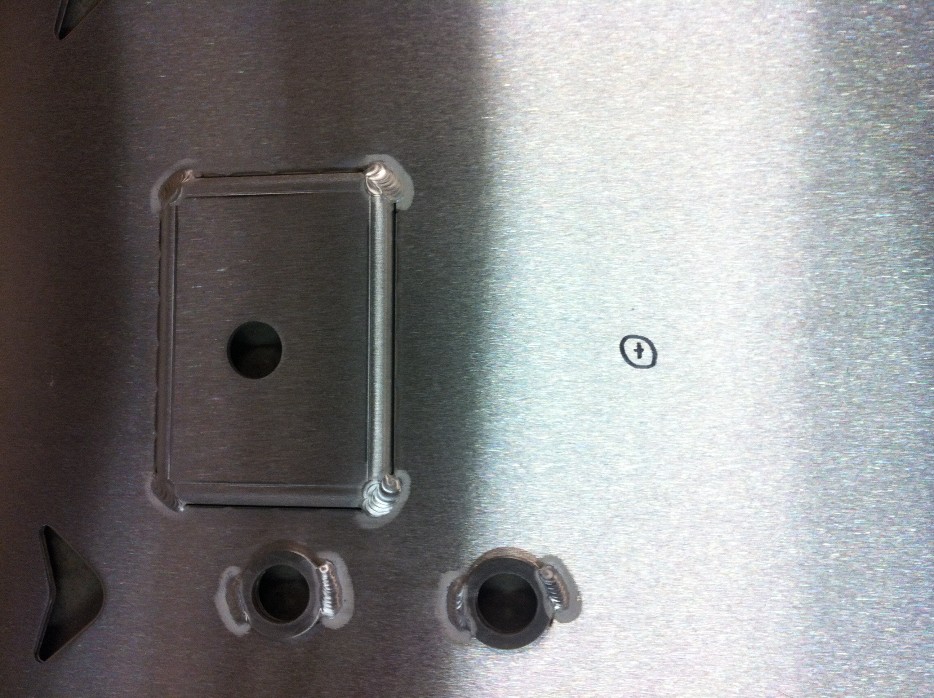
The CENTER REAR, had no access to the Rear Drive Shaft Zerk. And We wanted to
be able to access the Zirk without always having to remove the Side. So we
measured the distance, and drilled a hole in the New Skid with a Hole Cutout
bit. Easy to do. And good to go.
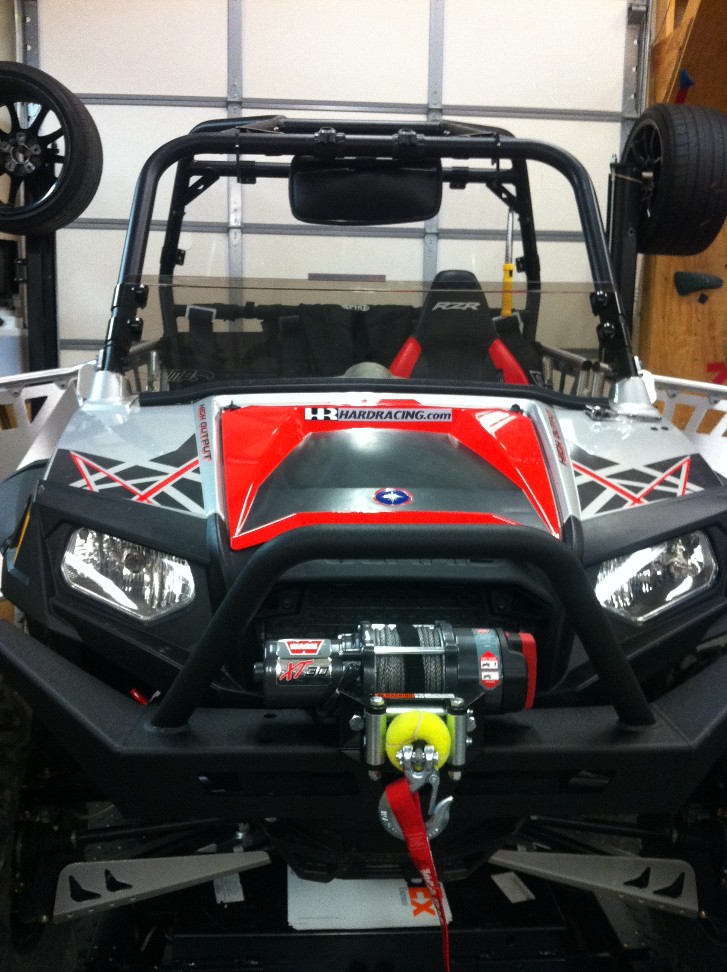
FRONT BUMPER
As most of you know the Front of our RZR is very vulnerable
to damage. It’s easy to get a little squirley on the trail and wind up bumping
a tree. Usually the Tree Wins. Unless you have Some protection. Without
protection on your front end, your Radiator can easily get smashed along with
your plastics. So our next course of action was a Front Bumper. We also wanted
it to have a winch mount as well. The higher the better, so the winch doesn’t
get submerged in water as often.
Since we had already decided on a WARN XT300 Wireless Winch, it seems logical to
go with the WARN Bumper/Winch Mount Package. For all of you that are about
“LIGHT WEIGHT” this is Not the bumper for you. This is Mild Steal. It’s a
Beast. Like Tank Style. But, damn it doesn’t fit, and look great. And works
exactly as advertised.
First you remove the Front plastic cover for stock location winch mount.
You Attach the Lower mount Plate into the Frame.
Then you have a Support bar that mounts, Behind your subframe. It’s attached
with Steel U-Bolts. On both sides.
This is really nice, because it gives more stability and strength in the event
you bang into something. And properly protects your Radiator, lights, and
plastics. 2 More bars connect the Bumper to this Rear Support bar. Bolts go
into the Bumper underneath to connect to the Bottom Support Plate, to complete
the install.


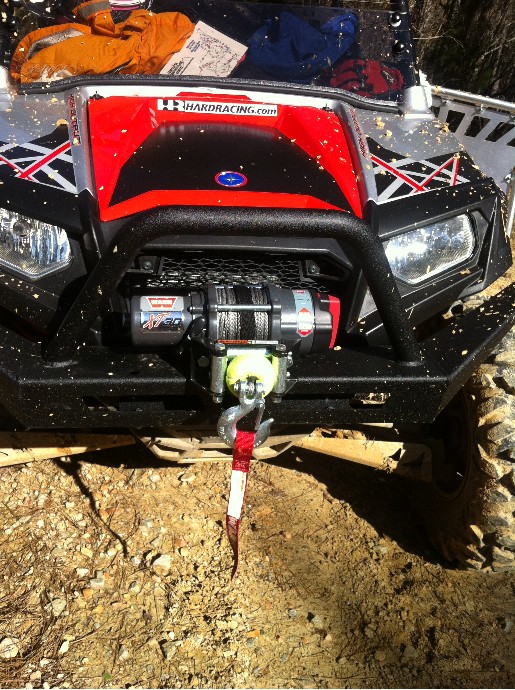
WINCH
The Winch nestles right in the middle of the Bumper for a somewhat
protected location. Keeping it up nice and high and out of water reach.
We opted for the WARN XT30 to save some weight. It uses a Synthetic Rope
instead of the Steel Cable. It also includes a Wireless remote which is really
nice. 3000lbs pull so it should be able to free us from any situation.
The Winch includes hardware and fairlead. Mounting points were easy to access
and everything bolted right up, since it was a WARN Bumper and a WARN Winch.
The bumper will ALSO Mount to most all common winches. Not just WARN.
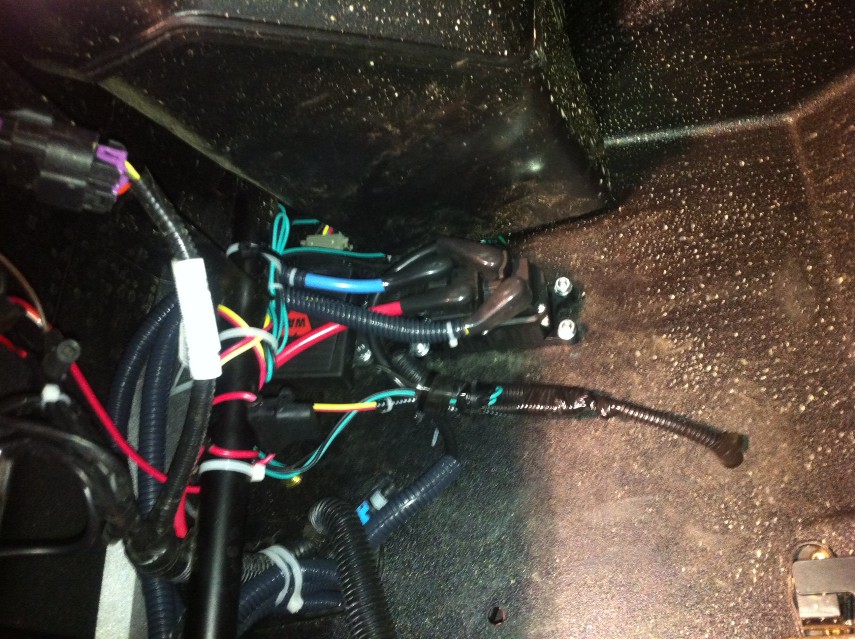
Wiring the winch is pretty straight forward. You have to run the power cables
from the winch into the Cabin area. There is a controller that we mounted up
high on the firewall. Which keeps it away from most water and dirt. Yet allows
us easy access if needed. Then we ran the rest of the power cables down
underneath and to the battery.

Now that we had the FRONT Bumper and Winch done, it was time to do a Rear Bumper.
REAR BUMPER
We also wanted to have a spare tire on board, just in case. The logical
Choice was EMP. They make outstanding quality Parts, in Cleveland Ohio. The
nice thing about EMP is most all their parts are made to work together.
Example. The Spare Tire Carrier bolts right onto the Rear Bumper. We also
installed a Rear Trailer Hitch Kit that overlaps with the Rear Bumper Lower
Support plate. The way they machine the parts allows it to share the same
location and mounting points.
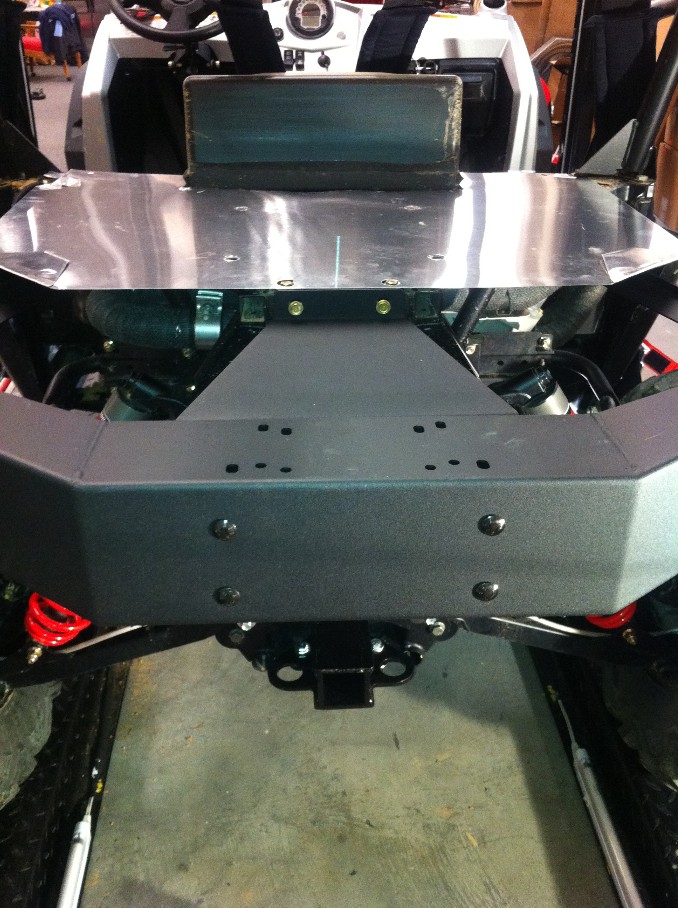
Install was very straight forward. You remove the rear plastics from your RZR.
We just took the entire bed off in one quick swoop.
That allowed us easy access to everything. Before we started on the bumper, we
remember reading about how hot the Temps got under the rear Truck Bed. So we
wrapped the Stock Exhaust in Thermal Exhaust Wrap. We also installed a Larger
Metal Heat Shield 24”x36”. This was sourced from Lowes for about $15. Easy to
work with and cut to size with Tin Snips.
Once that was complete we moved onto the Rear Bumper.
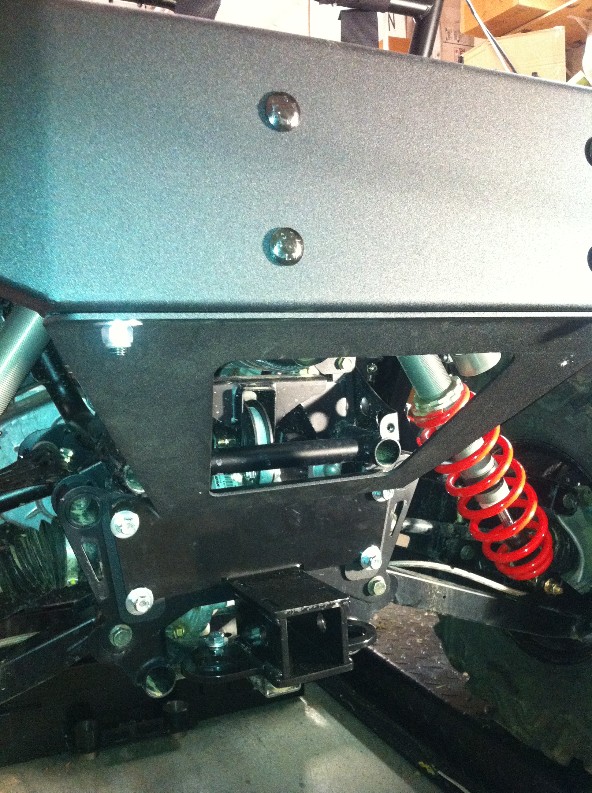
You remove the Upper OEM Support bracket and replace it with the EMP Upper
Mount for the Bumper. Then you install the Lower Support Plate. When
installing the lower support plate, we found the Included Carriage bolts where a
little to thick to fit. Again this could be from running change by Polaris, or
wide tolerance by Polaris. The Trailer Hitch plate goes on top of the Lower
Bumper Support Plate as they share the Same mount location.
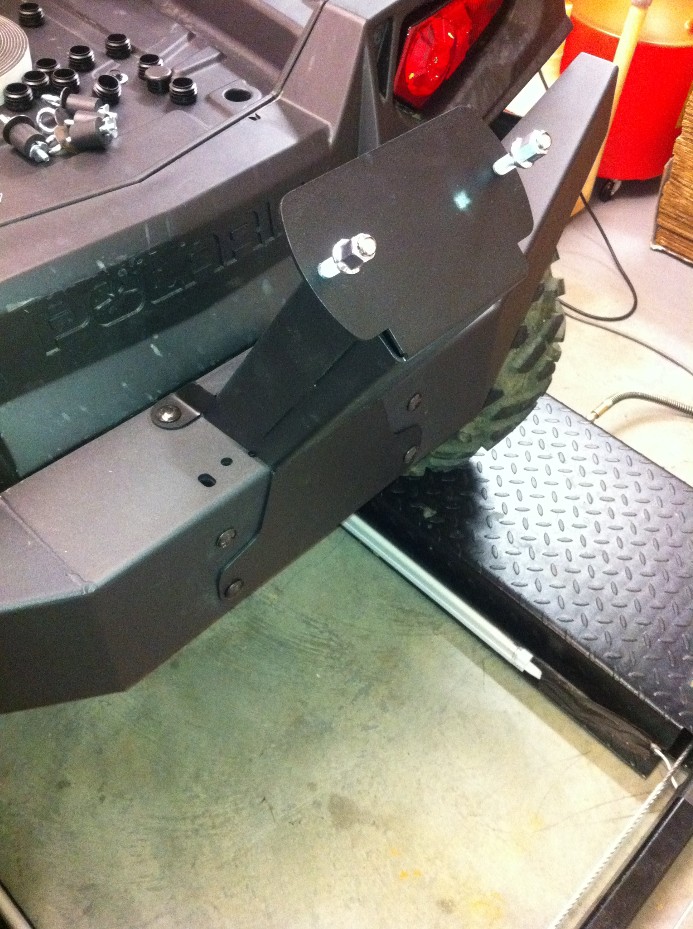
Then you mount the rear bumper. Before tightening the bolts, you take the last
2 Side Support bars, attach them to the bumper. Then you mark where they need
to attach to the rear subframe and Drill a small hole. After that you install
the bolts into the Sub-frame. Again, Before Tightening town, check all the
fitment. Now pull the rear bumper off, and install your plastics back on(Rear
Bed, and lights) Then you bolt the bumper back on along with the Spare Tire
Carrier (in our example) and tighten up all your carriage bolts. It’s takes a
little patience to work each bolt down tight, as there is just enough room to
get your socket wrench in there and crank them. We found the universal pivot
socket adapters really helped get the good angles on the bolts.
After it was all the done the end result looked great. The Rear Bumper is ROCK
Solid. And the Spare Tire sits back and out far enough to have complete access
to your rear truck bed. Or Storage box, in our example. (more to come on that)
The Carrier designed to accept Front or Rear Tires.


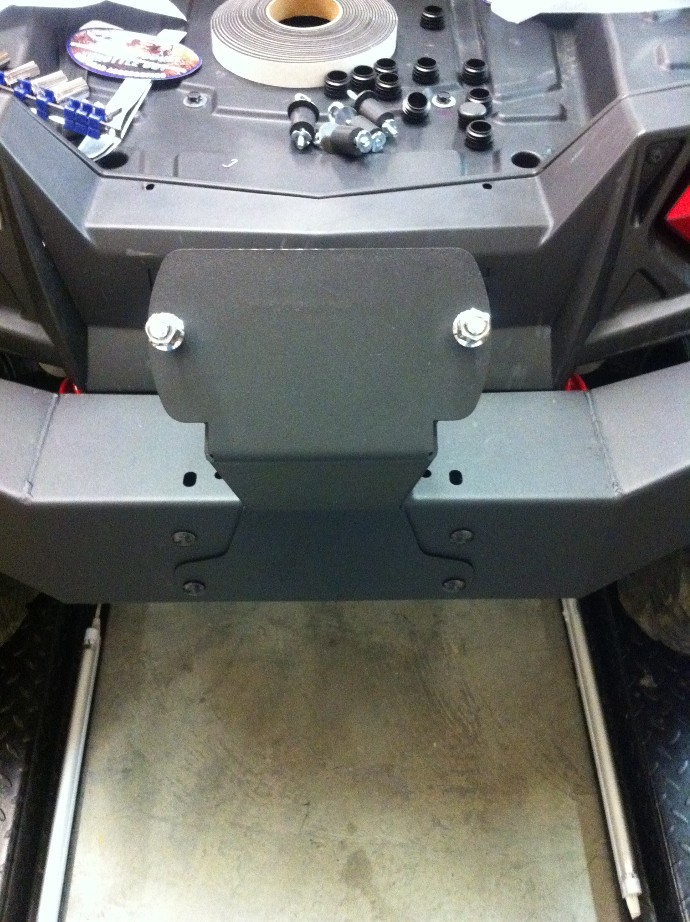
REAR BUMPER Spare Tire Carrier
This mounts directly to the rear bumper using 2 of the same Bolt holes that use Bumper use to mount to the Truck, and 2 more which are there specifically for the Carrier Mount. Access is limited, so you have to take your time if you’re using a regular ratchet & socket or box end wrench. We were fortunate to have an Airwrench, so install took about 3 minutes.
The Kit includes 2 lug nuts to secure your spare tire down.
Yes, it does add more length by sticking out off your bumper. BUT, you still
get FULL access to your rear bed/storage box. And it’s very easy to remove the
spare tire, in the event of a flat.
REAR STORAGE BOX ENCLOSURE
The Rear Truck bed can store a lot of stuff. Lots of guys like to put their
fuel tanks, and 3rd seat, Iglo coolers…etc.
We like to use it for tools, Spare Helmet, Jackets, Air Pump, Maps…etc. Stuff
we want to stay Dry and clean.
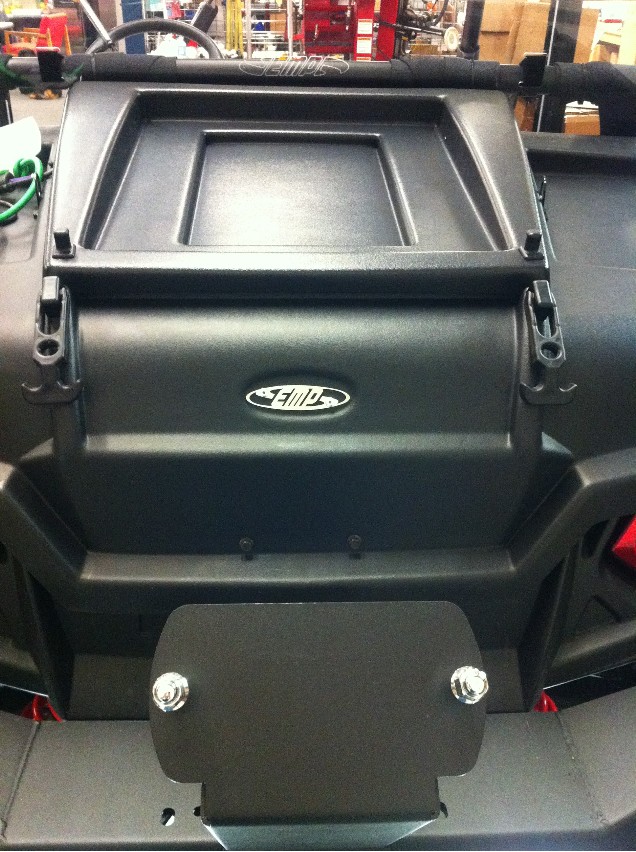
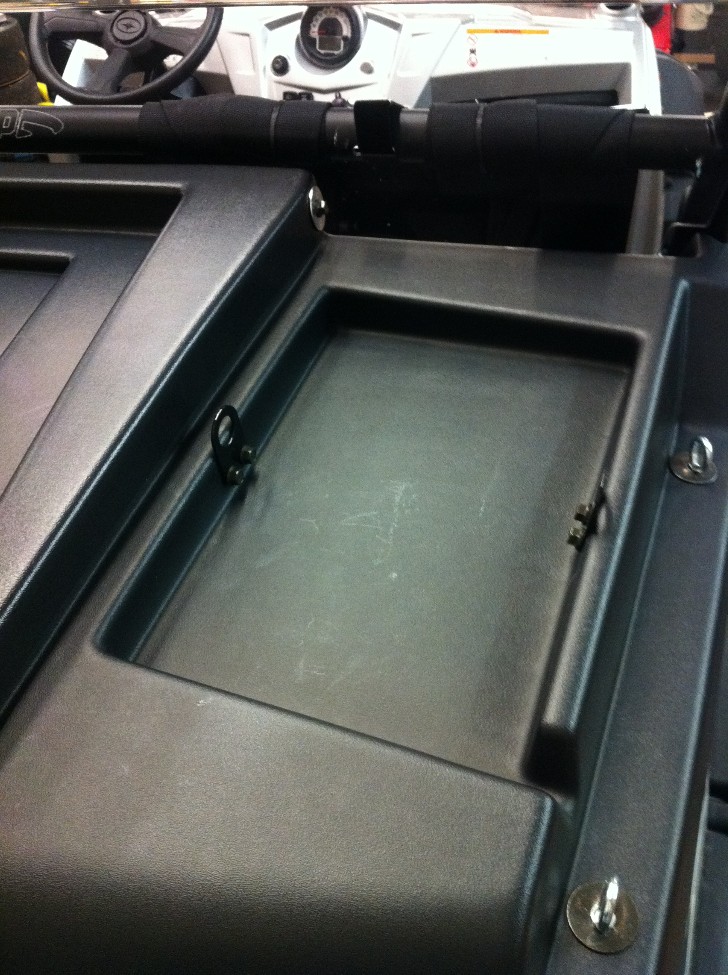
So, We installed the EMP REAR Bed Box enclosure. This seals up your rear bed,
and has a Huge access Door.
The great thing about this, is your can store all your stuff (Jackets, shirts,
towels, food, spare parts, wrenches, )And they stay Clean and Dry. No matter
how much mud flings on the back, they stay clean and dry.
The Enclosure comes with these nifty little plug caps, to fill in the holes in
the OEM Rear Bed.
Also included are 4 TieDown Anchor Plugs. Which not only secure it to your truck
bed, but you can use them to secure more stuff on the outside of the Box.
Installation is very straight forward. Clean off your rear Trunk, and install
the foam stripping on the sides.
We also installed the foam around the door opening. You mount the hardware on
the cover, using supplied bolts.
It also includes 4 anchor plates, used to secure something like a fuel tanks or
coolers.
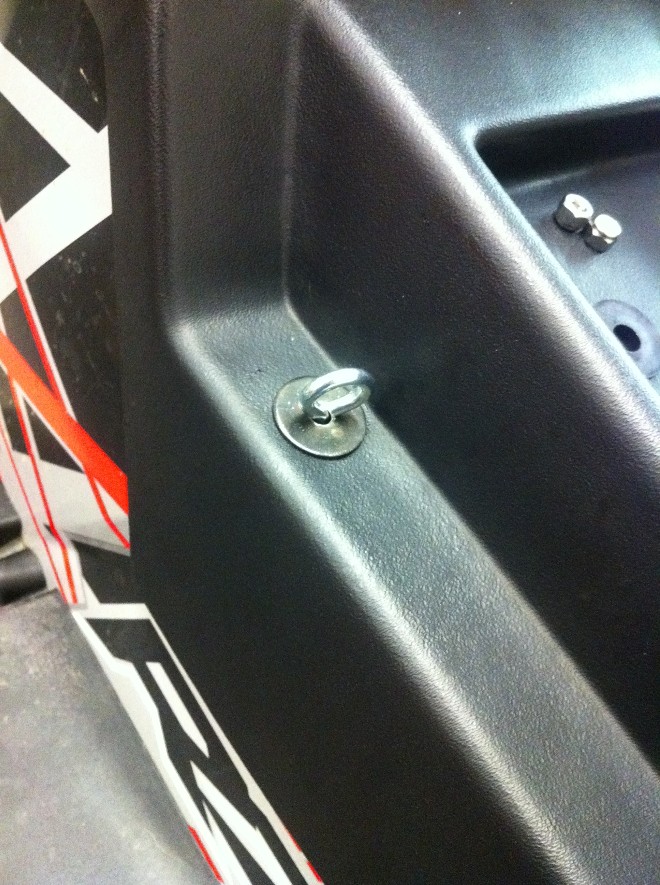
The only issue we found was the Access door, didn’t like to stay opened. So we
BASF’d it and added some large flat washers on the outside and inside surfaces.
This allowed us to crank the bolts down Tighter, to cause more friction and thus
keeps the door from falling on your head when your digging inside. Without the
washers, if you crank the bolts down, you would just wind up eat a hole into the
plastic shell And door.


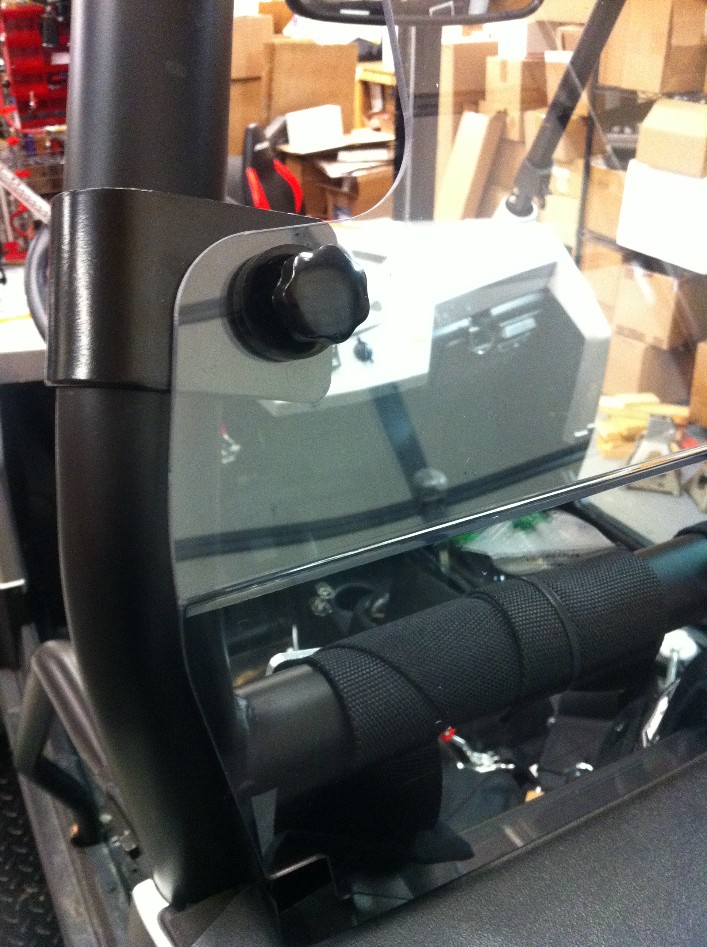
Front Windshield
We went with an EMP Half Front Windshield. Some guys
prefer the Full Shields, but, we like a little wind, and if it gets all mudded
up, you can still see out of it.
The kit includes 4 Quick Release mounts, and a Really nice quality Rubber Seal
that goes around the bottom edge to protect your bodywork. Installing the
gasket on the windshield take a little elbow Grease. The Gasket has little
teeth built into it
Easiest way, is to Kneel down on the floor and clamp the shield between to your
legs and really push down until you hear a pop
And then it will stay solidly secure two people makes it a lot easier The
Quick Release mounts a simple to install. You just mount them to the Roll Cage,
without tightening them down. Then you put the shield up to the roll cage, and
lightly secure the shield to the anchors. Once you have the Windshield in
position where you want it, you tighten both the anchor clamps with a socket and
the Shield Bolts with your fingers. Nice Clean Fit and finish.
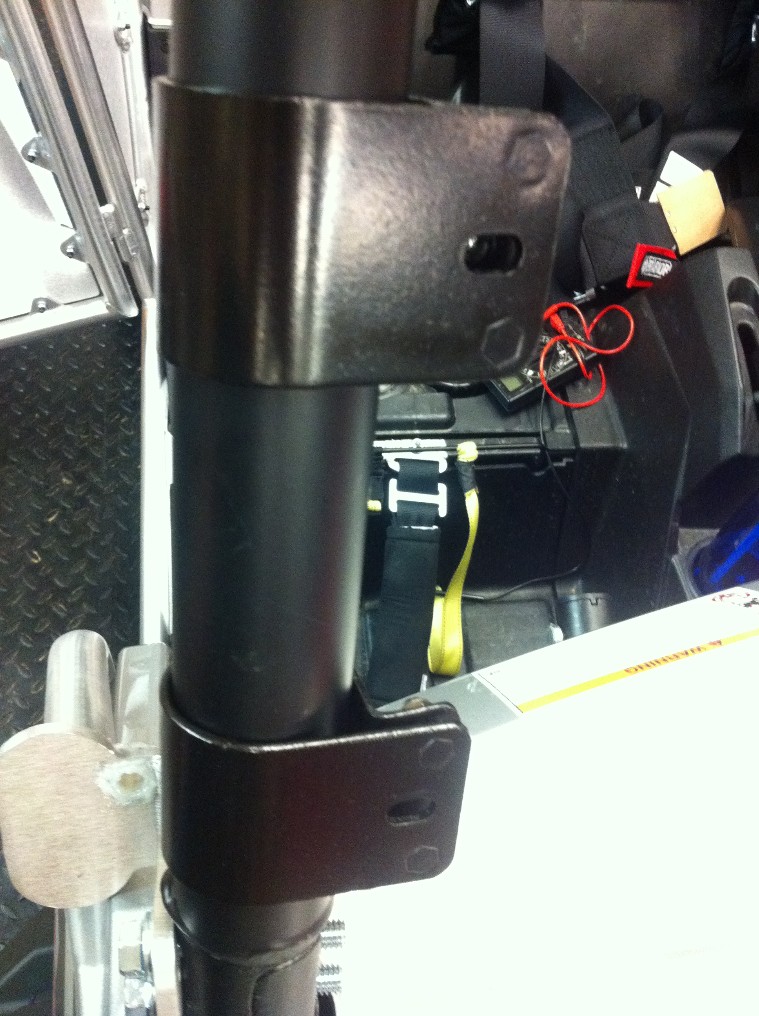
A common trick to keep your cable and anchor from flopping around is to install
a tennis ball on the end. This will act as a cushion within your Fairlead
to keep the cable from Chaffing.


REAR Windshield
Mud is great fun to drive through, but it sucks to get
flung all over your back. So a Full Rear Windshield was the logical Choice.
The EMP Full Rear Windshield was a perfect Fit. As with the Front Windshield,
it comes with 4 Quick Release mounts. Simple to install. You just mount them
to the Roll Cage, without tightening them down. Then you put the shield up to
the roll cage, and lightly secure the shield to the anchors. Once you have the
Windshield in position where you want it, you tighten both the anchor clamps
with a socket and the Shield Bolts with your fingers. Nice Clean Fit and
finish.
Roof
With the same idea as the Rear Winshield, keeping the mud and elements from
getting flung all over the cab, we went for the EMP Roof. They call it the
“Cooter Brown” Roof. It’s OEM Fit, and works perfect with the EMP Rear
Windshield.
Sits right on top of your roll cage. It has nice Water Drip Channels to help
keep some of the rain from dripping right into your cab. The sleek design keep
with the curves of the truck. Install is quick and easy with supplied
connectors that wrap around your roll cage and screw into the Roof. It also
includes a LED Map Light that you can install if you like.
.
DOORS
The door nets are better then nothing.
But, we prefer a little less mud inside the cab and all over us. It’s also nice
to have the solid protection of an alum. Door just in case you go to war with a
Tree, or worse do a complete roll over.
There are lots of door options on the market. We went for the Pro Armor. We
liked the looks, protection offered and they have a great reputation for top
quality fit and finish.
Installing the doors, is a pretty easy task, if you know these helpful hints.
To install the Pro Armor doors, you start by completely removing the Door Nets
from each side. Next you take out the seats
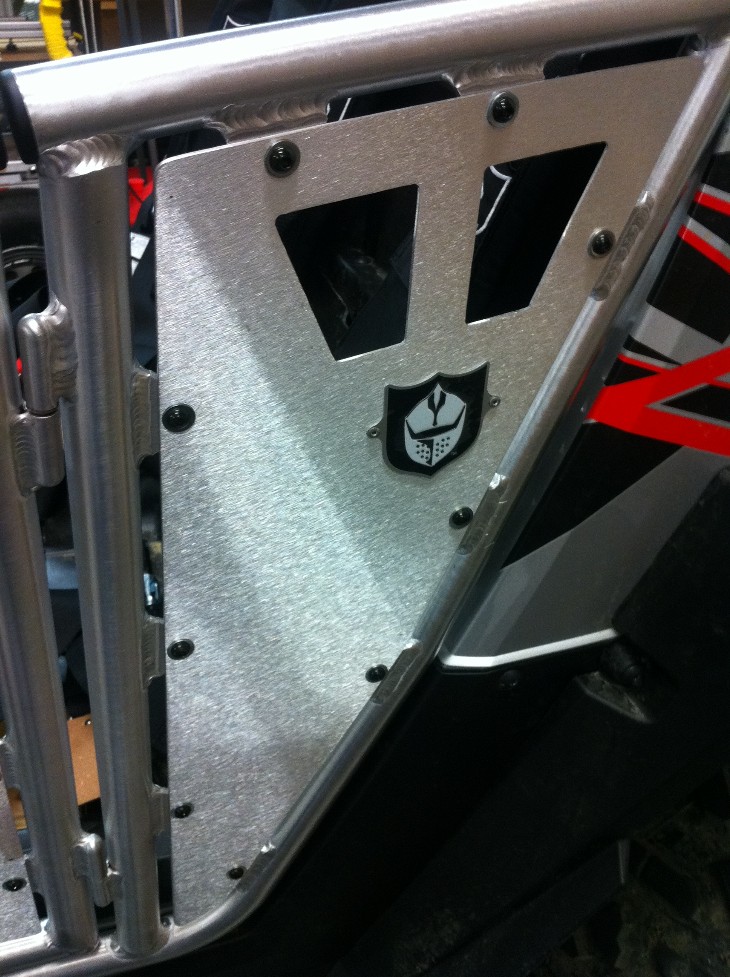
Then you assemble the Doors, by mounting the panels to the Door Frame. They
have a LOT of bolts and nuts.
Alignment was snug, so do NOT crank any of the bolts down until you have a bolt
in every hole with a nut on the back side.
Then crisscross tighten them like you do wheel Lug nuts. Once the panels are
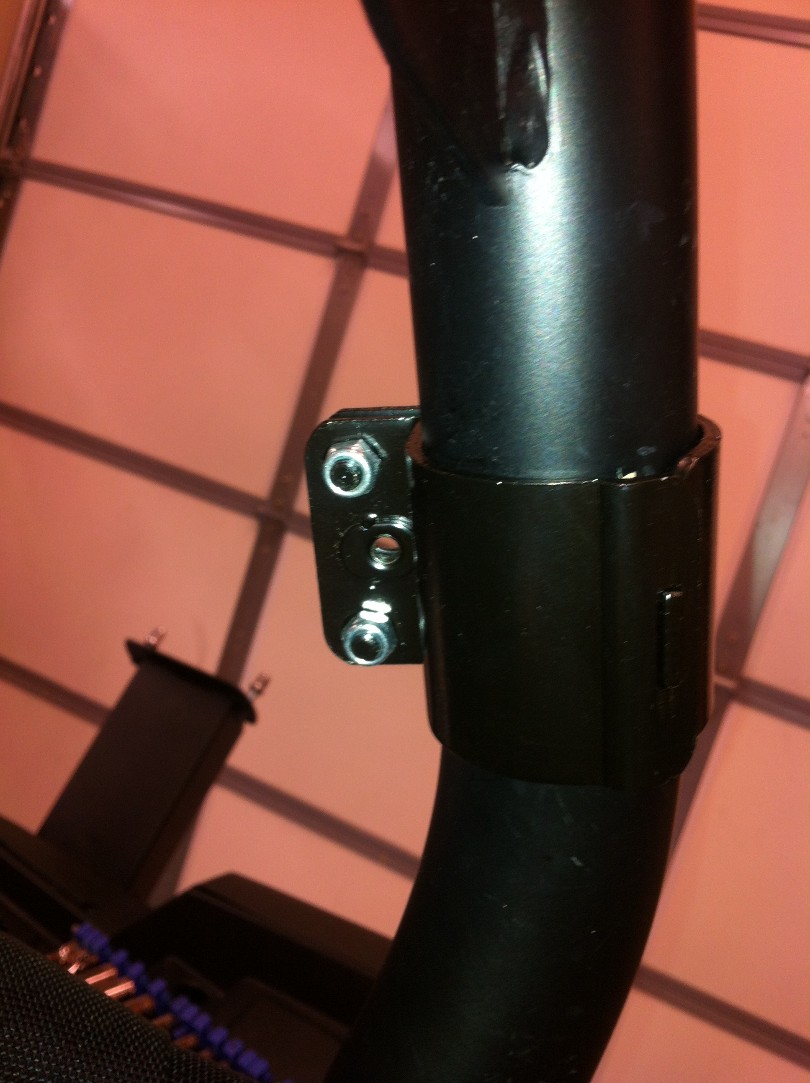
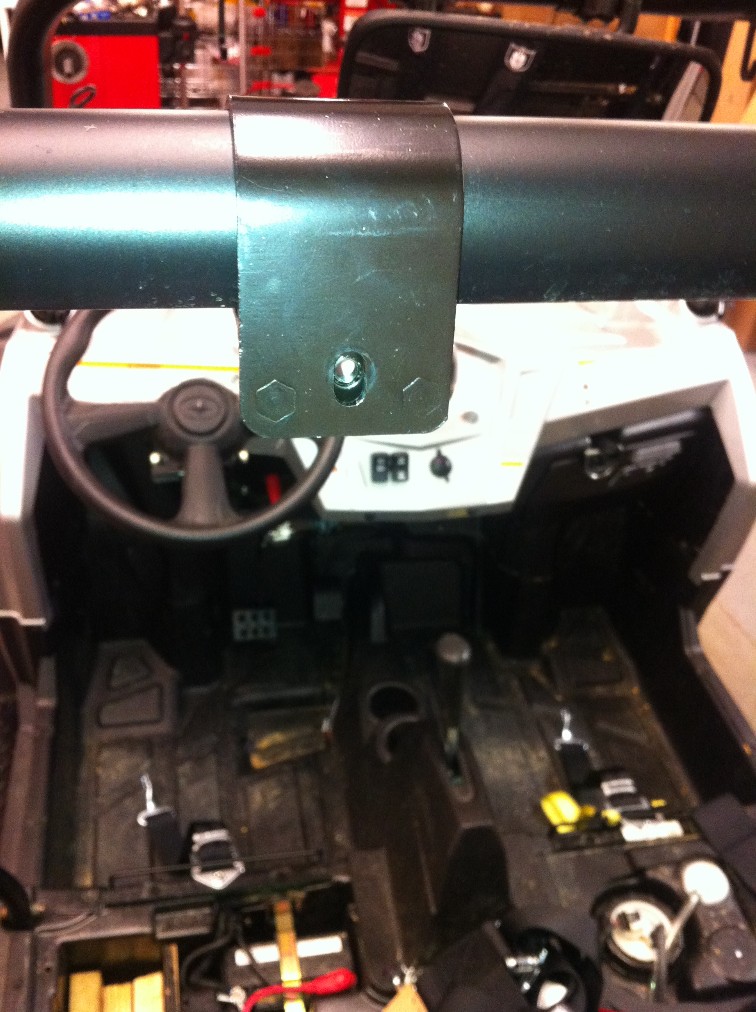
installed, you can begin mounting them to the truck. There are 3 mount points.
One on the Floor frame Rail. One behind the Seat. Then the final is where your
Front Roll cage mounts to the Frame. The first two are straight forward. The
Last one can be tricky. Here is a Tip to make it easier.
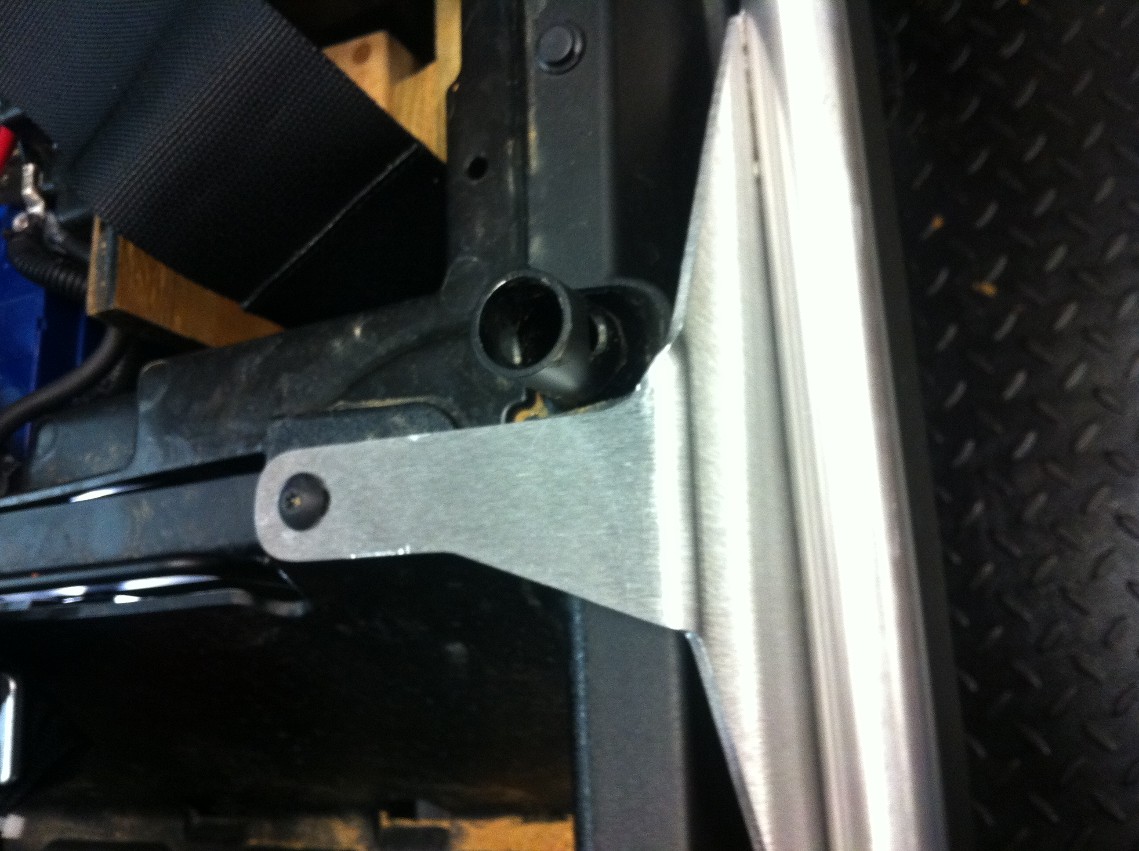
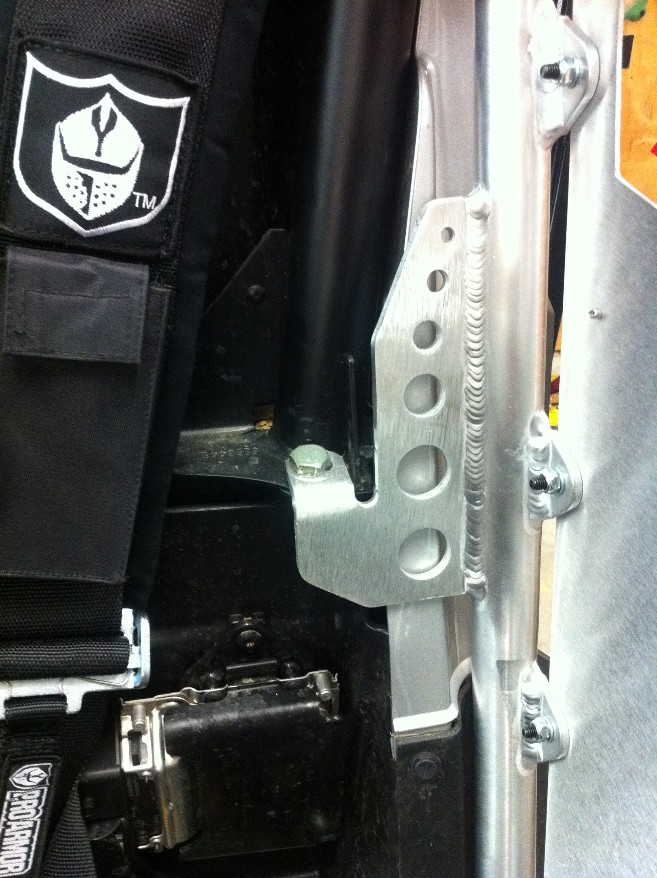


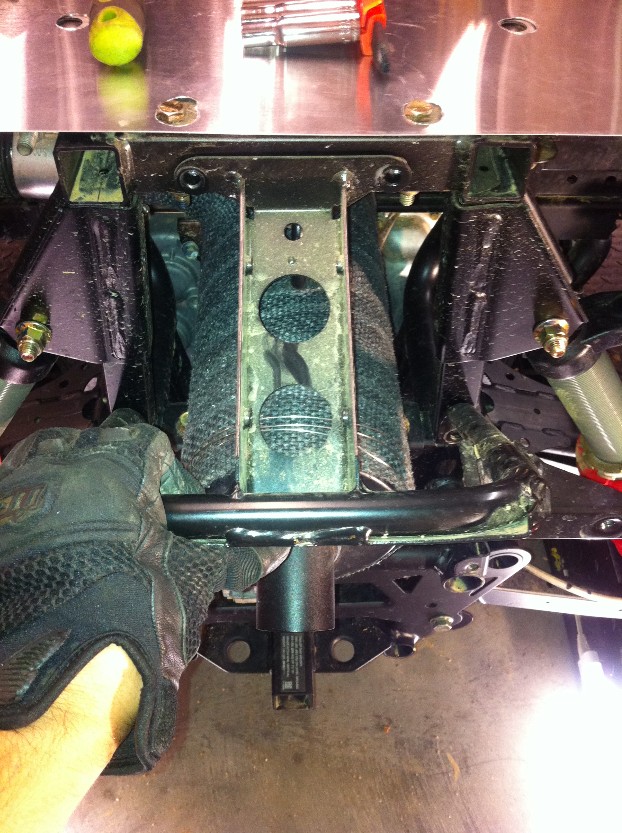
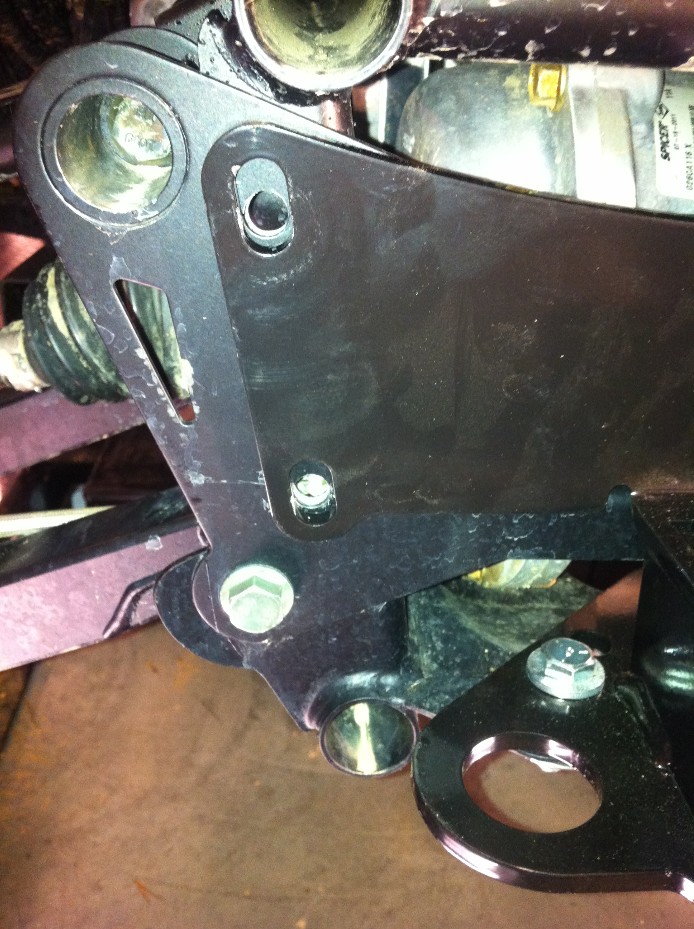
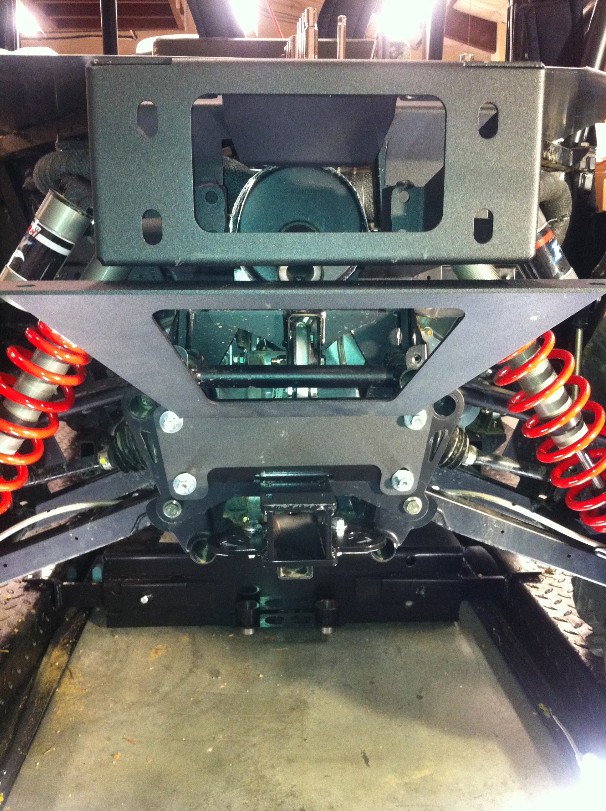
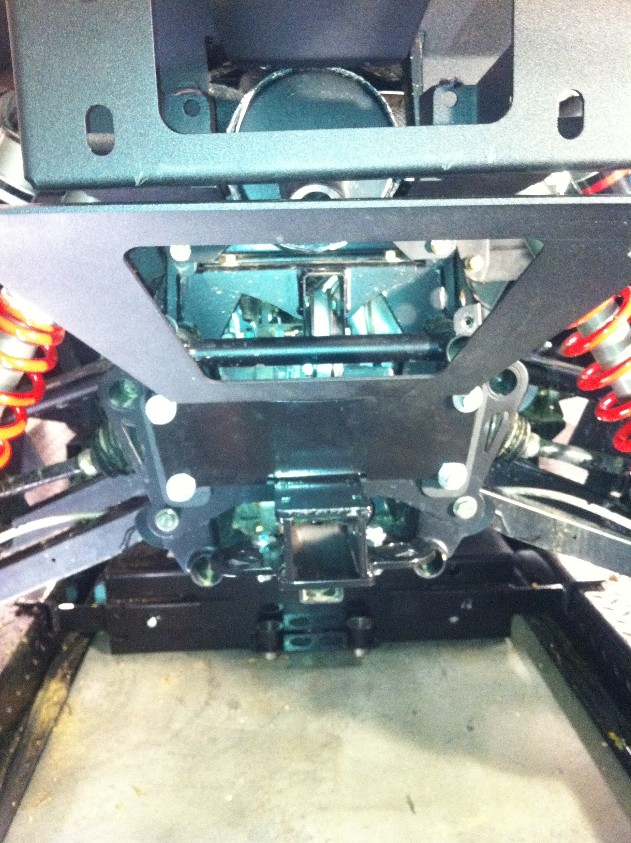
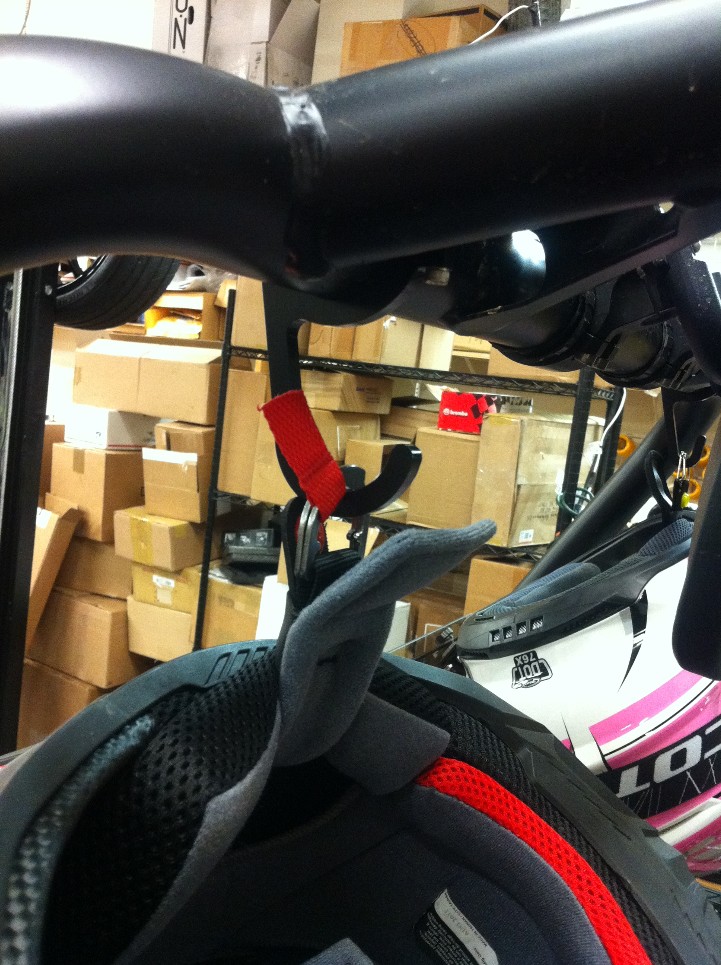
Some of you may have already tried this. But, for those who haven't. Here is a little trick to help making door installation a lot easier. The RZR's actually use the Roll Cage as a Support member for the frame.
Meaning when you remove the Mounts, the Frame kinda wants to buckle. It's not a lot of movement, but enough to make putting the bolts back in a PITA. Most of the Door Instructions say, "Jack your UTV Off the ground".
Well that does work.. sort of. But, it also flexes the frame to where you may Not get a good alignment.
When we lowered it back down, nothing aligned up the same.
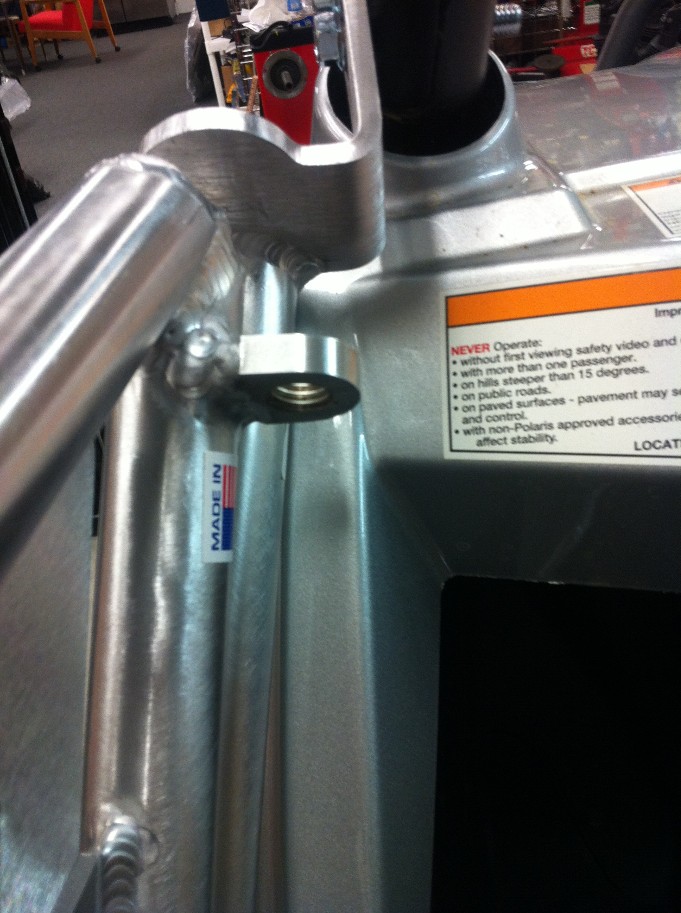
So we tried something else. If you run a Tie down Strap between your two Front A-Pillars, this will keep the roll bars for popping out and shifting out of alignment.
We didn't even have to jack the UTV off the ground. All bolts where removed on both side, and no issues.
It was like we didn't even remove the bolts.
See photos here.

Hopefully this helps any of you DIY'rs in Future
modifications.
After the door is completely installed, check for clearance issues.
Once you have that confirmed, you’re ready to drill the hole for your Door Pin
Latch. Just make sure you take your time and get the correct location. Check
it twice. Drill Once. J
You then install the Teflon Spacer into the hole to keep the door from
rattling. They also include some Hardfoam inserts to put against the lower
frame, to also assist in keeping vibrations down.
All in all it’s very nice and complete setup.
Another helpful bit of information. We found it best to use some Big Diameter
Flat Washers on the roll cage front bolts, so when you crank them down they
don’t dig into the Metal Plate on the door. That way if you have to remove them
later or adjust the alignment on the Door Frame, and reinstall, they turn
freely. Otherwise they dig into the Door frame, and make a recess.
The Panels you installed that have all the little bolts in them. Some of them
are mounted closely to where your knees or shoulders would hit. Probably
wouldn’t feel good . So we found some rubber nipples ends and pushed them onto
the ends of the bolts, as a protection. Also help not tear your shirts or pants
if they got hung up on them.

HARNESS
As most of you have done, We wanted a little more safety, .. just in case.
So we opt. for the 5 pt. Harness from Pro Armor as well.
They have really nice wide padded straps. Easy to use.
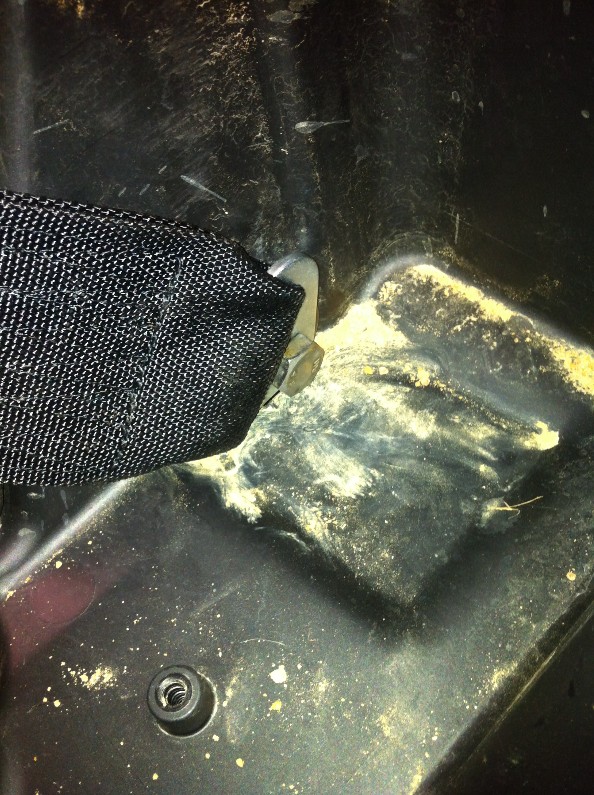
To install Obviously, you remove the The stock Seat belts completely. One of
the Harness Lap belt mounts go into the Stock Seat Belt hole on the outside.
The other lap belt mounts go to the Stock location in the middle of the seats.
You simply remove the rubber boot to get easy access to the bolts. You can even
run the lap belts through the rubber boots, to keep nice OEM Look. The Shoulder
Straps go across the rear Roll bar. Once you size them how you like them, take
the excess strapping and wrap it around the bar and secure with a ziptie. This
will keep it from flapping around and getting in the way. We opt. for the 5th
Point Center Belt that comes up from between your legs. Some guys don’t use
that. But we found the without it the harness tends to creep up your torso.
Not only that, but it helps keep it secure in place for more safety… helping
ensure you never slide out underneath the harness in a bad rollover. It can
happen.


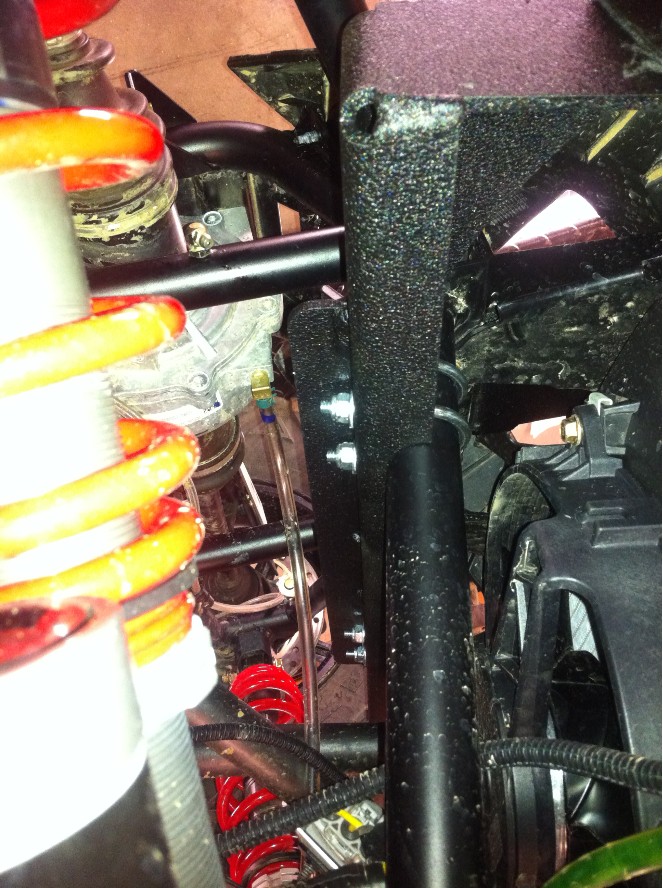
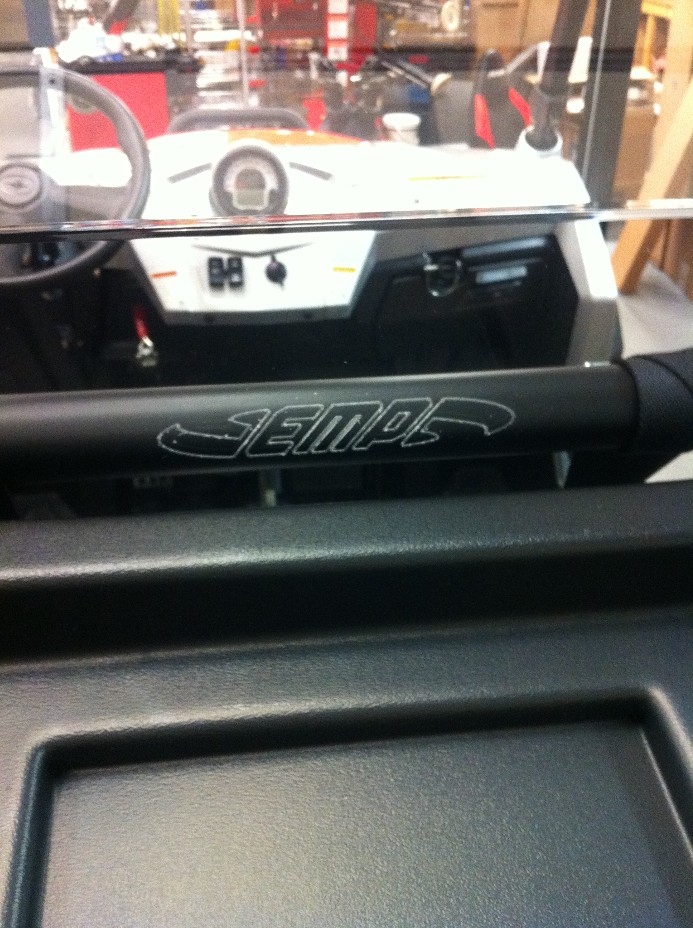
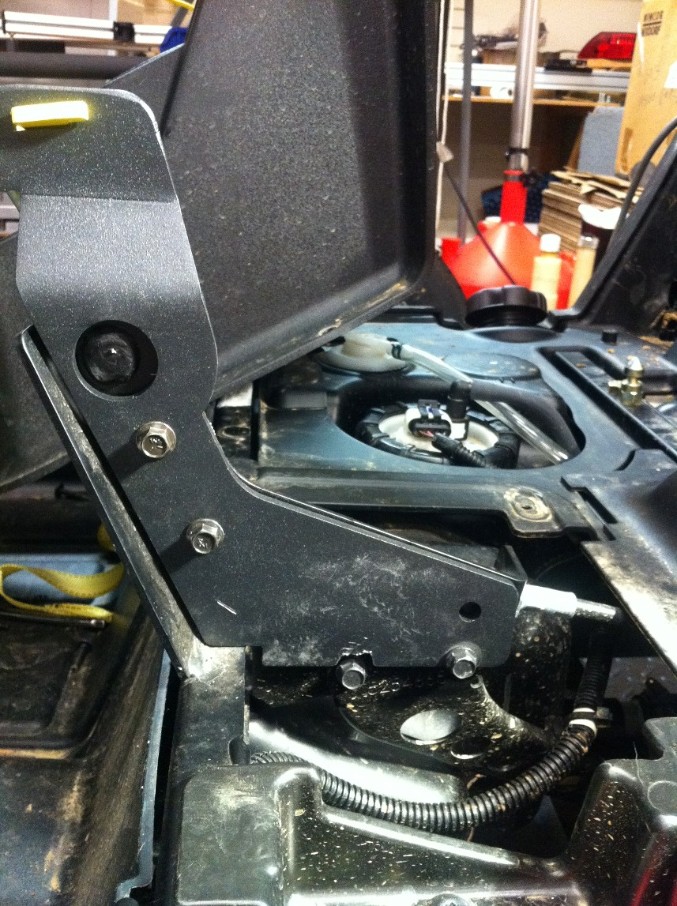
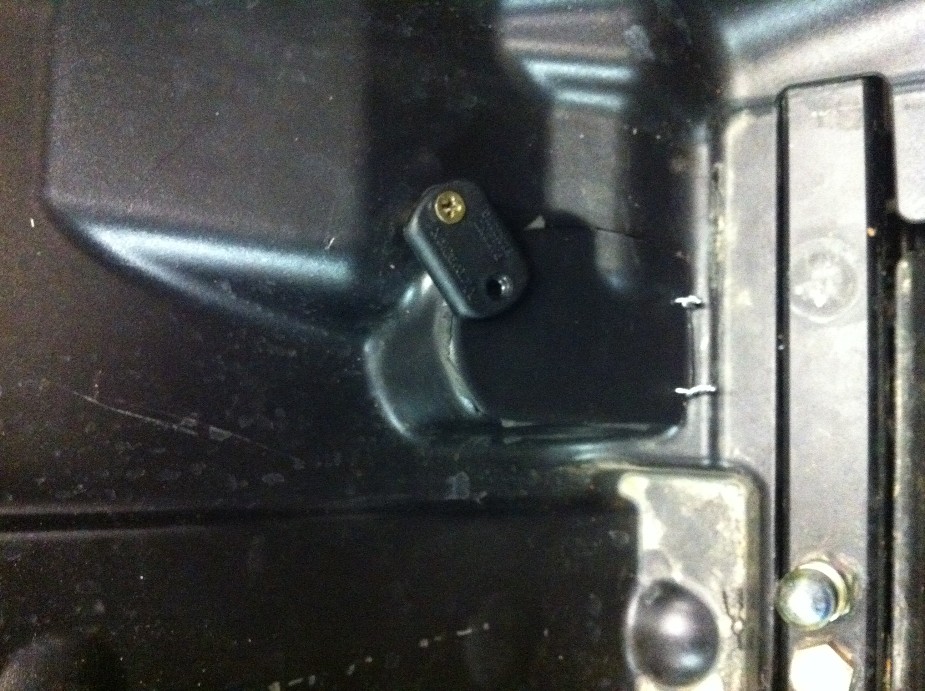
Antitheft PARKING LOCK
Next we did a Little Anti Theft Prevention. The EMP
Shifter Lock.
This helps prevents would be thieves from easily stealing your RZR. Yea, you
can also put an alarm on it. Or a Boot on the wheels.
But, for us, this was an easy and inexpensive mod that only took a few min.
Simply pop off your Shift knob, and unscrew the Center
console and remove. This gives you access to the shifter. You just bolt on
with the stock hardware and included bolts. We always want everything to fit
perfect. Sometimes we have to “B.A.S.F.” the part. In this case, that meant
notching the bottom to clear one of the Bolts. We didn’t have to do it. But,
we wanted a perfect smooth fit. It seems like there is such Large Tolerance in
Polaris’s work, that you cannot make a perfect part for every RZR. Nonetheless,
it fits great, and works great. Simply run a lock through it, and it’s at least
going to make it very very difficult for a would be thief to just steal your
RZR.
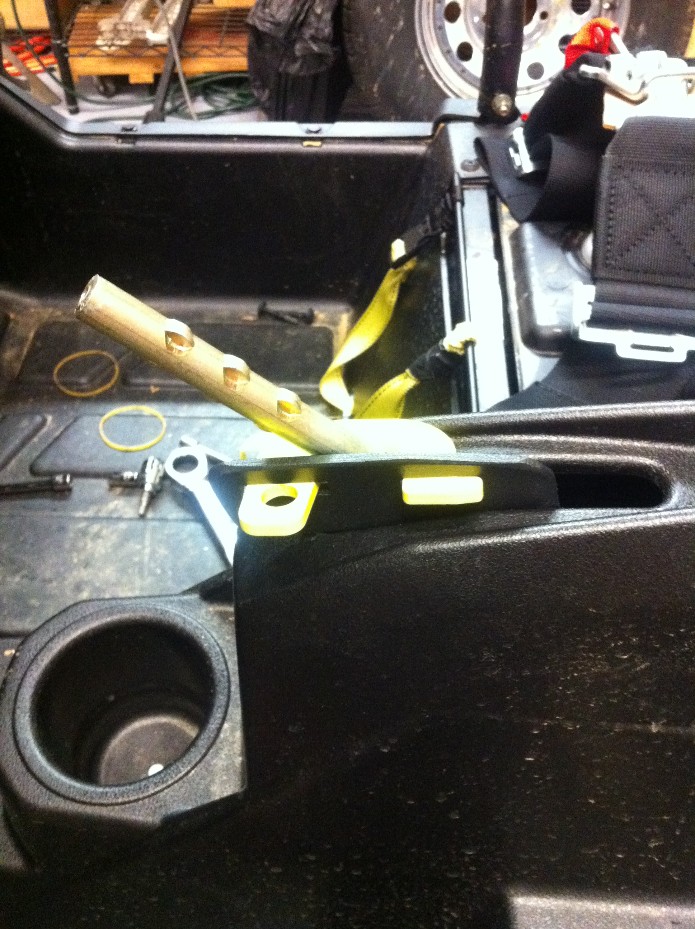
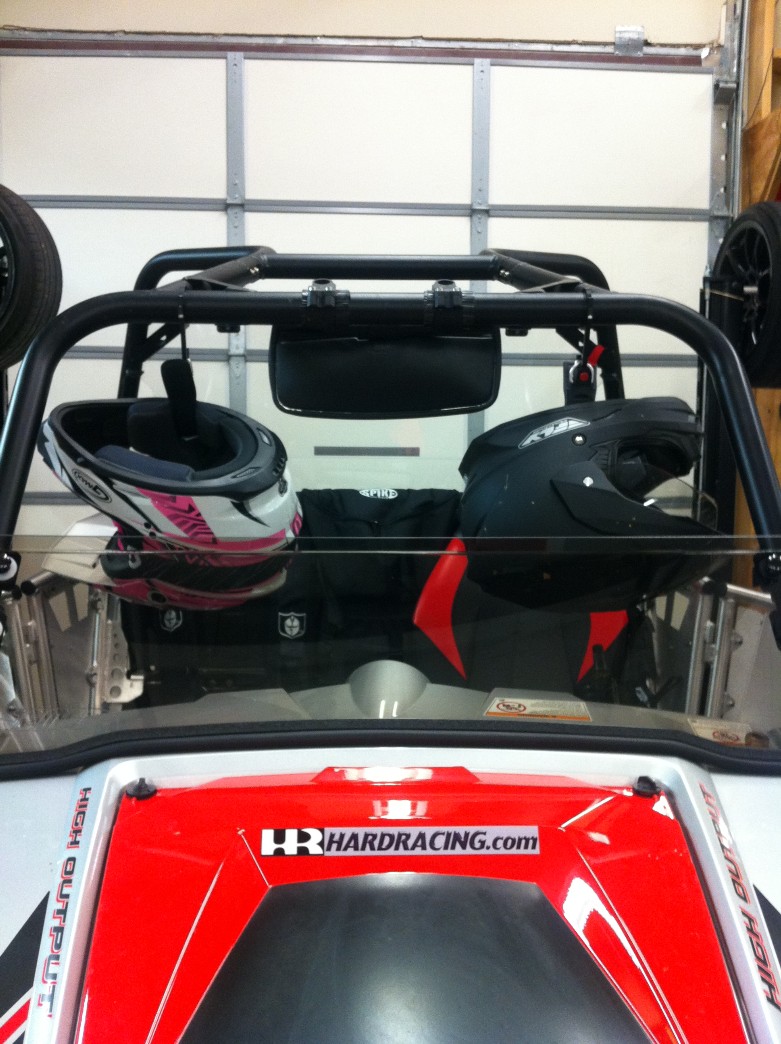
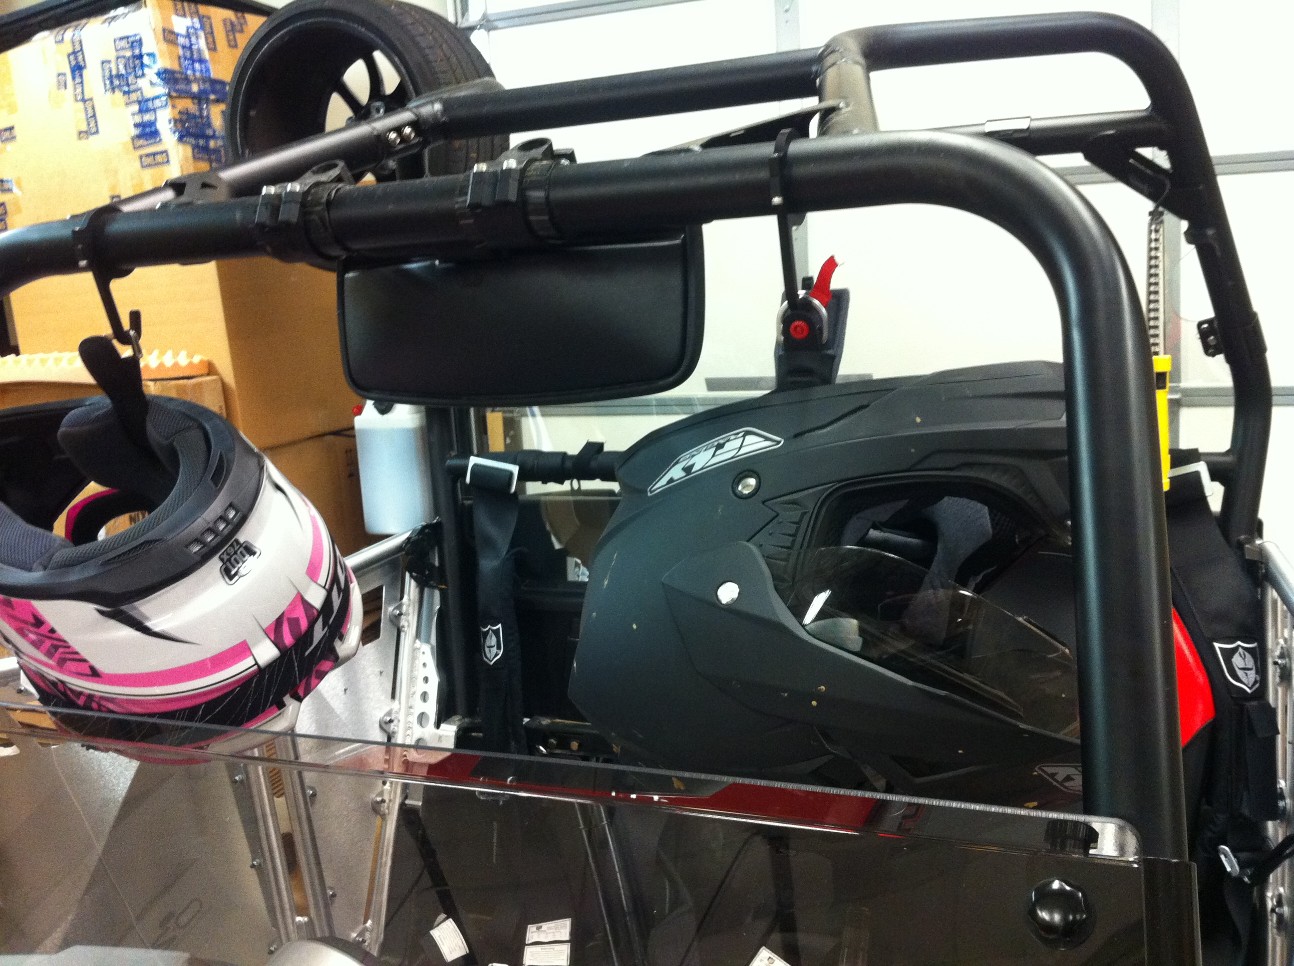
Helmet Hooks
Small little mod, we did for an easy way to hang your
helmet out of the way, when you want to sit in your truck or just put them
somewhere they won’t slide off and fall to the ground.
Oil Access Door (self Explaining)

Aftermarket Pedals
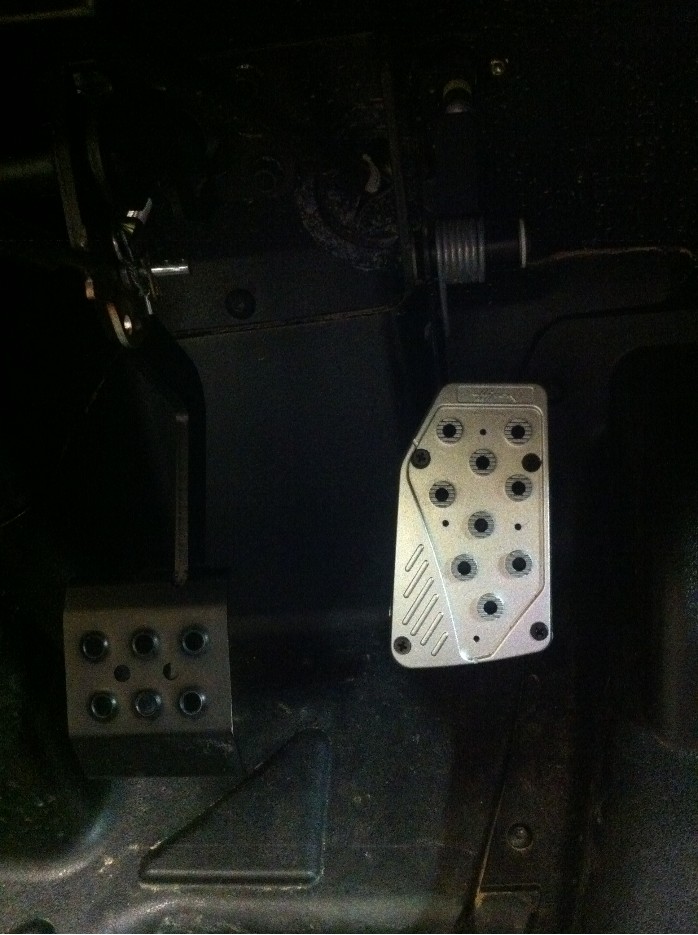
Less slippage when your trying to stay on the gas.
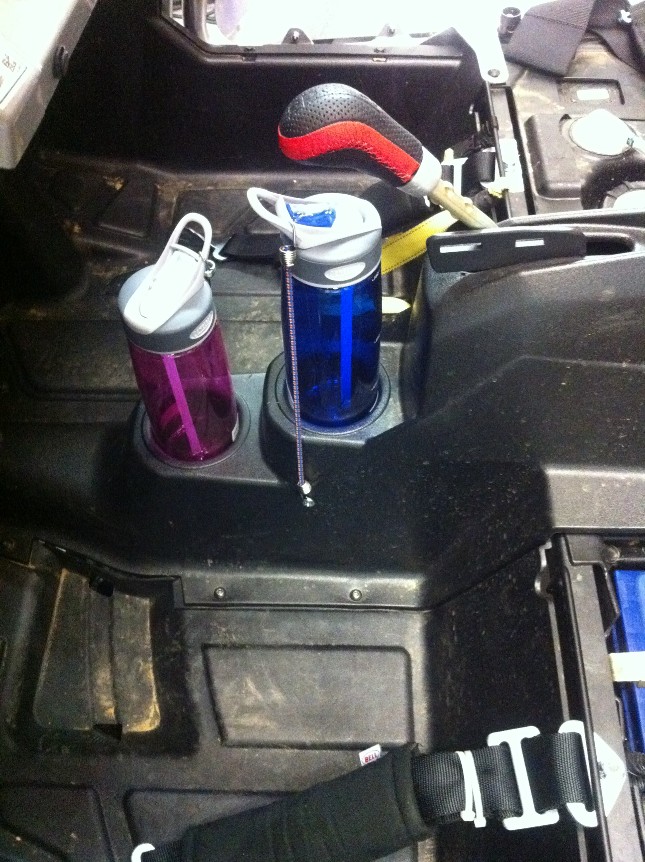
Cup Holder Secure Straps Self Explaining
FINAL WEIGHT
When it was all said and done, we re-weighed our RZR to see how much it gained
and where.
So our Corner weight Scales showed the RZR in Stock Trim came in at 1103 lbs
Total w/ a ˝ tank of Fuel
After all the modifications, it came in at 1426 lbs. So we gained 323 lbs.
Which sucked.
But, considering we added all this stuff, it could have been worse. The PLUS
Side was, Weight Distribution was very similar to stock with 40.8% up front and
59.2% in the Rear. Only adding 1% more Front weight bias vs. previously, 41.8%
of that weight was in the front, and 58.2% in the Rear in stock Trim.
Cross weight was 49.7% Meaning the Machine was pretty close to the optimal 50%
cross weight. On Road surface you want it within .5%-1% of 50%... so we are
pretty much SPOT ON for a Neutral handling Truck. This is good, when you’re
doing a lot of Fast Pace trail riding, and switch backs. Not as important
when you’re going flat out in the Sand dunes.
J
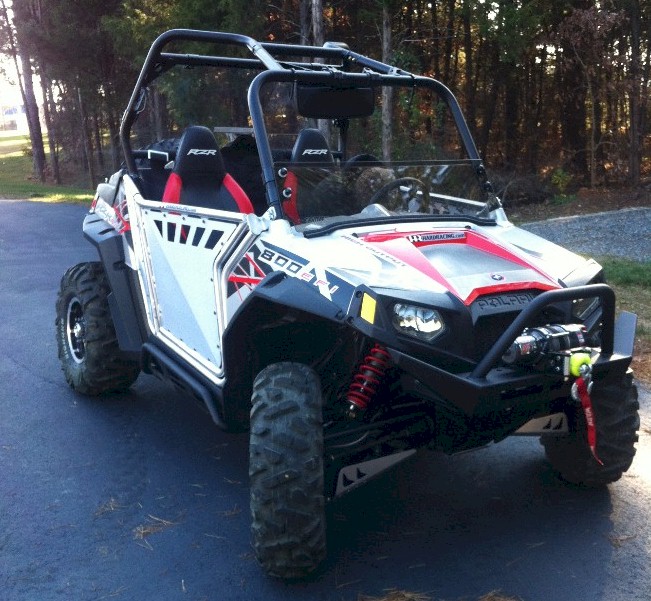
So there it is. Our complete write up on our RZR Project. Hopefully this helps
a few guys who may be considering some or many of these similar mods.
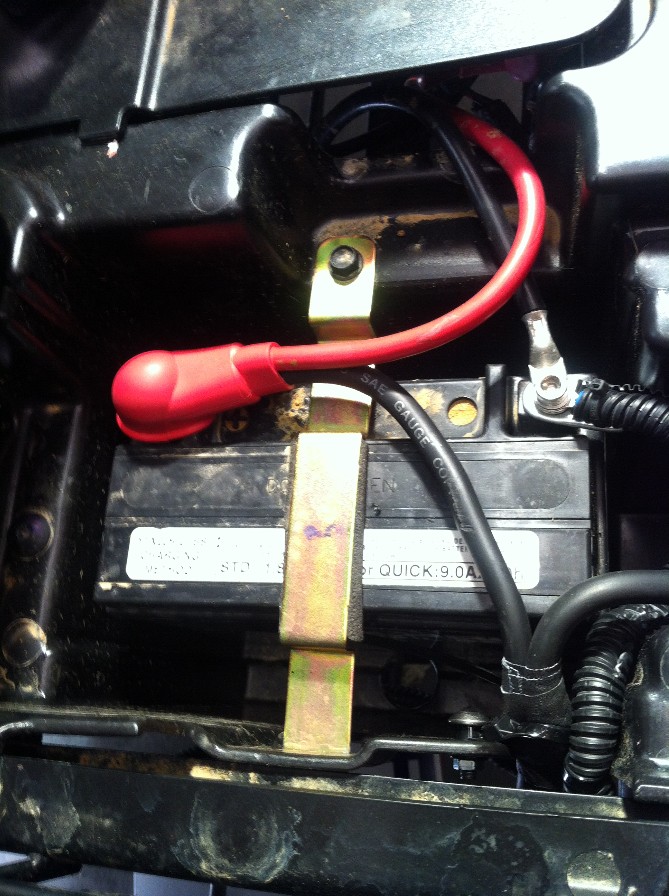
UPDATE:
We Decided to Shed a Little Weight.
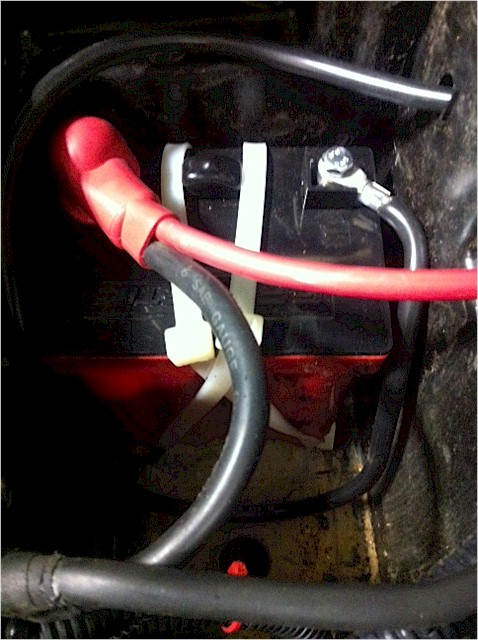
So we Remove Oversized LED ACID BATTERY - 22 lbs.... that we started using when
the OEM Crapped out.
And Replaced it with Ballistic Lightweight Lithium Ion 500 CCA Battery at 3.6
lbs
So that saved us little over 18.4 lbs Not to shabby.
And gained some storage space back, for blocks of wood to use as JACK PLATES.
Then we added a Battery Switch to make sure no parasitic Draw damaged the
battery.

If you have any questions, or comments, please feel free to email.
Thanks